
CSE 360 Helpdesk
Role
Frontend / Fullstack Developer
A simple helpdesk system for CSE 360 students to quickly get help from TAs and Professors.
Live Demo: https://cse360.tet.moe (Use tetTestingCode as the Sign Up code)
GitHub Repository: https://github.com/icedTet/CSE360-Project (Currently private)
Table of Contents
Preface
Product Vision
ASU Students come into CSE 360 through many paths. Some have significant programming experience, while others have just the required course to be admitted to the class. The goal of the class is to provide every member of the class with a solid foundational survey of Software Engineering principles and concepts, practical individual experience applying some of them, and a team experience in producing a realistic and complex application demonstrating a deeper understanding of a set of these principles and concepts and the ability to work effectively as a member of a team.
One challenge that many face is finding an effective and reliable source of information to help them quickly and effectively accomplish the tasks required so they have time to experiment and dig deeper if they are so inclined or focus time on other courses or activities if they are more important.
We envision a help system that makes it easier for ASU to provide current, accurate, and relevant information to CSE 360 students. It must be done in a way that does not waste the student's time by providing information that is too complex or too simplified for the situation the student is facing. For the system to support the unique needs of each student well, personal information must be used. For example, the student may indicate that they are excellent in programming in Java, are familiar but not skilled with Eclipse, and are a true beginner with JavaFX and GitHub. Some students may feel uncomfortable if anyone else sees this personal information. (To be honest, such personal information should never be made available to others without expressed permission being given.) When the student can't quickly find the information they need, an easy-to-use method must be provided to let the instructional team know the issue and what was viewed so they can provide new information that is more likely to be effective. Similarly, the system should allow the student to specify "more like this but with more detail" or "more like this with less detail". One critical source of data for the help system must come from Ed Discussion, so the questions and potential answers that are important this semester can be supported by the help system.
The instructional team must be able to quickly replace materials from an old version of the class with a new version of the class. When a new tool becomes available (e.g., the web page to register for GitHub changes), it is easy for the team to find and update (or remove) the existing help entries as well as provide new ones. A survey of the Ed Discussions data must be analyzed to identify topics or issues that the help system should be able to address. Are there reasons why students didn't use the help system? Do the key terms set for the help item need to be enhanced to make it easier for the student to find the needed help? (If the student uses words that are not in the list of key terms, mechanical search methods will not work. Maybe newer AI search methods can be used.) Each new help item needs tags so that searching can be effective, as well as information about the target user (e.g., beginner, expert), and so forth.
An administrator needs to be able to back up and restore the help data and the users, and add, edit, and remove individual articles and individuals. Just because this individual can add, remove, back up, and restore users does not mean they should have access to personal/private information. Additional actions include resetting a user's access with a one-time password so a user can get back into the system and set up a new password without the admin knowing the old, one-time, or new passwords for a user.
There must be room in your product's implementation to support other roles (beyond those stated here) and provide actions these different roles can perform.
Beginning / Background
Even from the first day of this class, I already understood CSE360 was going to be a hands-on project-based class, a class where you actually learn to build something interesting. And, upon being tasked with this project, I decided, using my background of building applications and hobby-level software, it was far time for me to build something awesome in this class and ASU in general. Thus, I signed up to do an honor’s contract for this class. After some research and brainstorming, I ended up deciding to focus on user accessibility and design for this project, possibly branching out to other facets if time permitted.
Deciding on Technologies
Although the class officially suggested that we use JavaFX and Eclipse to build this project, the professor allowed us to use other technologies so long as we understood there would be no support provided. As a result, my team and I had discussed and came to the conclusion that, in order to deliver a product that exceeded expectations, we would be using the following technologies:
Frontend Technologies
Next.JS - For coding reactive and responsive interfaces
TailwindCSS - For quickly styling the interface and making things look pretty
Backend Technologies
REST Spring Boot - For creating the REST API handler for most of the website calls.
MongoDB - For storage and retrieval of the data.
Maven - As the build automation tool to build a production/live jar that can be self-hosted
As I was primarily in charge of the frontend of the application, I decided to prioritize application interactivity, page load times, and approachable application design in the application. Consequently, I opted to use Next.JS for its relatively fast load times and reactivity (React) and its web optimizations. Tailwind would be my pick for styling the application page for both its utility-first approach to CSS and speedy development workflow, allowing me to efficiently create and iterate on designs without unnecessary bloat or littering random values everywhere.
Although I did not focus on working with the backend, my team and I decided to focus on deployability (as in real world use) and reliability. And as such, we decided on using Spring Boot for our HTTP server, as it can easily handle requests and is proven to be reliable as used by companies like Chase, AmEx, and Visa. We chose MongoDB as the backend due to its ability to handle large amounts of data and its developer-friendly approach. Development is simplified as MongoDB documents map naturally to modern, object-oriented programming languages. Using MongoDB removes the complex object-relational mapping (ORM) layer that translates objects in code to relational tables. Finally, we chose Maven as our build automation tool to streamline our development and deployment process. Its ability to package our Spring Boot application into a self-contained JAR file was crucial for deployment, as it bundles all necessary dependencies and configurations into a single executable file. This made it straightforward to deploy our application across different environments, whether for testing or production.
Phase 1 Implementation
Phase 1 Requirements
As per the requirements of the project, the first phase must:
Focus on establishing the foundation for a secure and private identity mechanism for the application. Your team must demonstrate that the requirements for users and roles stated above can be implemented. (Be aware that an admin might also be a student. How can that be supported?)
Implementation Plan
Given the requirements, My team and I decided to focus on the following features for the first phase:
- User authentication and authorization (login, logout, and signups)
- User roles (User, Admin, Mod, etc.)
- User data storage and retrieval
To do this, we modeled the User class to have the following fields:
type User = {
  _id: ObjectId; // MongoDB ID for the user
  username: string; // User defined username
  email: string; // User defined email
  password: string; // User defined password (hashed + salted)
  roles: DBRef[]; // Roles the user has as a DBRef to the Role collection
};
As an example, here's what my user object would look like in the database. Note my password is hashed and salted for security reasons.
{
  "_id": {
    "$oid": "670777cc8be28826ae2ec1e5"
  },
  "username": "tet",
  "email": "tet@tet.moe",
  "password": "$2a$10$VT8cRbNjJG2oXsU7kibsqusKiwz7bsFQRMqRT7WC6q3fA5yHvo2JW",
  "roles": [
    {
      "$ref": "roles",
      "$id": {
        "$oid": "67077649540f4aa347aa909c"
      }
    },
    {
      "$ref": "roles",
      "$id": {
        "$oid": "67077649540f4aa347aa909d"
      }
    },
  ],
  "_class": "com.cse360.backend.models.User"
}
Now that we have our user model, we can move on to the implementation of the backend and frontend.
Implementing the Frontend Phase 1
When approaching the frontend implementation, I began by establishing a clear architectural foundation that would support the complex requirements of our help system. The first step involved setting up a Next.js project with TypeScript support, which would provide us with robust type checking and better code maintainability. I initially began with a yarn create next-app, setting up the basic Next.JS project with TypeScript support. I then installed TailwindCSS using yarn add -D tailwindcss postcss autoprefixer and set up the necessary configuration files through yarn tailwindcss init -p. This allowed me to quickly style the application using Tailwind's utility-first approach, which significantly sped up the development process. After setting up the project, I created and styled the necessary components for very basic components like TextBoxes and Buttons, which would be used throughout the application. For example, the login form was created using a TextBox component and a Button component, which were styled using TailwindCSS classes. This approach allowed me to quickly create and style components without writing custom CSS, saving time and effort.
<div className="w-full min-h-screen relative">
      <div className="max-w-[90%] w-[45ch] absolute top-1/2 left-1/2 -translate-x-1/2 -translate-y-1/2 bg-gray-50 z-10 rounded-3xl shadow-lg p-10 flex flex-col gap-4">
        <h1 className="font-poppins text-xl font-semibold text-gray-700 pb-4">
          Login
        </h1>
        {error && (
          <div
            className={`bg-red-800/10 p-4 rounded-2xl flex flex-row gap-4 text-red-900 items-center ${
              error ? `block` : `hidden`
            } overflow-hidden transition-all duration-300`}
            aria-label="Error message"
          >
            <ExclamationTriangleIcon className="h-6 w-6 leading-4" />
            <p className="font-wsans text-sm leading-4 font-medium">{error}</p>
          </div>
        )}
        <label htmlFor="username" className="sr-only">
          Username
        </label>
        <input
          id="username"
          type="text"
          placeholder="Username"
          className="basicinput"
          value={username}
          onChange={(e) => setUsername(e.target.value)}
          disabled={loading}
          aria-label="Username"
        />
        <label htmlFor="password" className="sr-only">
          Password
        </label>
        <input
          id="password"
          type="password"
          placeholder="Password"
          className="basicinput"
          value={password}
          onChange={(e) => setPassword(e.target.value)}
          disabled={loading}
          aria-label="Password"
        />
        {/* Login button */}
        <button
          className={`btn-primary mt-4 disabled:opacity-50`}
          onClick={verifyForm}
          disabled={loading}
          aria-label="Login"
        >
          Login
        </button>
        {/* Register link */}
        <div className="flex flex-row gap-1 opacity-50 text-sm">
          Don't have an account?
          <Link href="/auth/register" aria-label="Register for a new account">
            Register
          </Link>
        </div>
      </div>
      {/* Background overlay */}
      <div
        className={`w-full h-full absolute top-0 left-0 meshy opacity-10 z-0`}
      />
    </div>
.basicinput {
  @apply w-full h-12 rounded-lg border border-gray-200 focus:border-gray-800 focus:outline-none px-4 bg-gray-100/25 shadow-inner font-wsans text-base text-gray-600 disabled:opacity-50 placeholder:text-sm;
}
.inputlabel {
  @apply text-gray-900/30 font-medium font-wsans text-sm;
}
.btn-primary {
  @apply w-fit bg-blue-600 hover:bg-blue-500 text-white font-wsans font-medium py-2 px-12 rounded-3xl text-lg disabled:opacity-20 disabled:cursor-not-allowed;
}
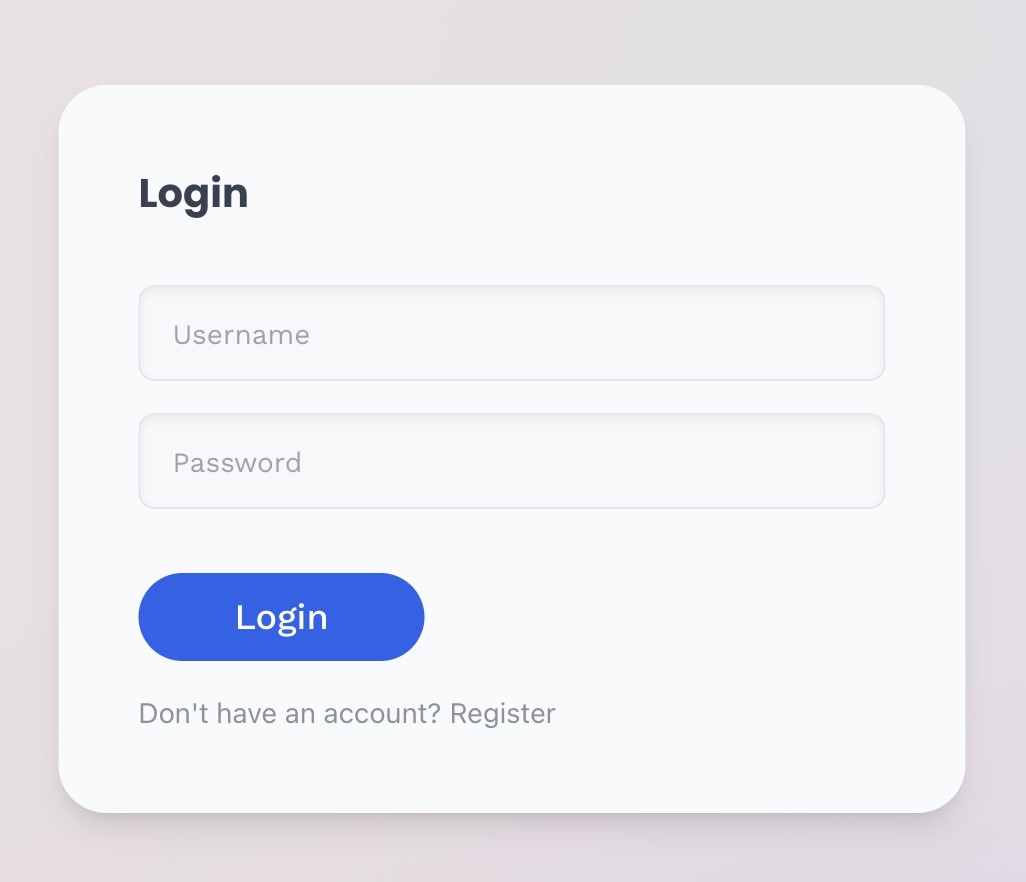
The final login form and the classes used to render it out.
After creating the basic components, I focused on setting up the necessary routing and authentication logic for the application. I used Next.js's built-in routing system to create the necessary routes for the application, such as the login and registration pages. Authentication was a bit more complex, as we decided to write our own authentication logic using JWT tokens. When a user logs in, the client sends a POST request to the server with the user's credentials. If the credentials are valid, the server generates a JWT token and sends it back to the client, which stores it in local storage. The client then attaches the token to all subsequent requests to authenticate the user, and redirects them to the dashboard page. This approach allowed us to create a simple and secure authentication system that could be easily extended in the future.
// The login code
export const login = async (username: string, password: string) => {
  const response = await fetch(`${serverURL}/api/auth/signin`, {
    method: "POST",
    headers: {
      "Content-Type": "application/json",
    },
    body: JSON.stringify({ username, password }),
  });

  // Handle server errors (5xx)
  if (~~(response.status / 100) !== 2 || !response.ok) {
    return null;
  }

  // Parse and return the response
  let data = await response.json();
  return data as LoginResultResponse;
};

// ...

login(username, password).then((response) => {
    setLoading(false);
    if (!response) {
    setError("Invalid username or password");
    return null;
    }
    setSuccess(true);
    localStorage.setItem("token", response.accessToken!);
    SelfUserClass.getInstance().fetchUser();
    router.push("/dashboard");
});
Now that the frontend is set up, I can move on to the backend implementation.
Implementing the Backend Phase 1
When implementing the backend, I began by setting up a Spring Boot project with MongoDB support. I used Spring Boot's built-in support for MongoDB to create a simple REST API that would handle user authentication and authorization. I started by creating a User model that would represent a user in the database. The User model contained fields such as username, email, password, and roles, which would be used to authenticate and authorize users. I then created a UserRepository interface that would handle CRUD operations on the User model. This interface extended the MongoRepository interface provided by Spring Data MongoDB, which provided built-in support for common database operations such as save, find, and delete. I then created a User Auth Controller that would handle user authentication and authorization. This controller contained endpoints for user sign-in and sign-up, which would generate JWT tokens for authenticated users. I used Spring Security to secure the endpoints and authenticate users using their credentials. Finally, I created a JwtUtils class that would generate and validate JWT tokens. This class contained methods for generating tokens, extracting user details from tokens, and validating tokens. This approach allowed me to create a secure and reliable authentication system that could be easily extended in the future.
/**
 * Controller that handles authentication-related operations such as user sign-in and sign-up.
 * Exposes two API endpoints:
 */
@CrossOrigin(origins = "*", maxAge = 3600)
@RestController
@RequestMapping("/api/auth")
public class AuthController {

    // AuthenticationManager handles user authentication.
    @Autowired
    AuthenticationManager authenticationManager;

    // Repository for accessing user data.
    @Autowired
    UserRepository userRepository;

    // Repository for accessing role data.
    @Autowired
    RoleRepository roleRepository;

    // Password encoder for hashing user passwords.
    @Autowired
    PasswordEncoder encoder;

    // Utility class for working with JWT tokens.
    @Autowired
    JwtUtils jwtUtils;

    /**
     * Authenticates a user with the given login credentials and generates a JWT token.
     *
     * @param loginRequest the login request containing the username and password
     * @return a ResponseEntity containing the JWT token and user details if authentication succeeds
     */
    @PostMapping("/signin")
    public ResponseEntity<?> authenticateUser(@Valid @RequestBody LoginRequest loginRequest) {

        // Authenticate user using their credentials.
        Authentication authentication = authenticationManager.authenticate(
                new UsernamePasswordAuthenticationToken(loginRequest.getUsername(), loginRequest.getPassword()));

        // Set the authentication context in the security holder.
        SecurityContextHolder.getContext().setAuthentication(authentication);

        // Generate JWT token for authenticated user.
        String jwt = jwtUtils.generateJwtToken(authentication);

        // Extract user details (principal) from the authentication object.
        UserDetailsImpl userDetails = (UserDetailsImpl) authentication.getPrincipal();

        // Collect roles associated with the user.
        List<String> roles = userDetails.getAuthorities().stream()
                .map(item -> item.getAuthority())
                .collect(Collectors.toList());

        // Return the JWT token and user details in the response.
        return ResponseEntity.ok(new JwtResponse(jwt,
                                                 userDetails.getId(),
                                                 userDetails.getUsername(),
                                                 userDetails.getEmail(),
                                                 roles));
    }
    // ... other methods
}
After setting up the backend, I tested the authentication and authorization logic by sending requests to the server using Postman. I also wrote up a very quick /api/users/@me endpoint that would return the user's information if they were authenticated. This allowed me to verify that the authentication and authorization logic was working correctly and that the user's information was being stored and retrieved from the database. With the backend and frontend now implemented, I could move on to integrating the two systems and testing the application as a whole.
@RestController
@RequestMapping("/api/users")
@CrossOrigin
public class UserEndpointsController {
    @Autowired
    JwtUtils jwtUtils;
    @Autowired
    UserRepository userRepository;


    @CrossOrigin
    @RequestMapping("/@me")
    public ResponseEntity<?> getSelf(@RequestHeader String Authorization) {
        String token = Authorization.substring(7);
        String username = jwtUtils.getUserNameFromJwtToken(token);
        return ResponseEntity.ok(userRepository.findByUsername(username).get());
    }
    // ... other methods
}
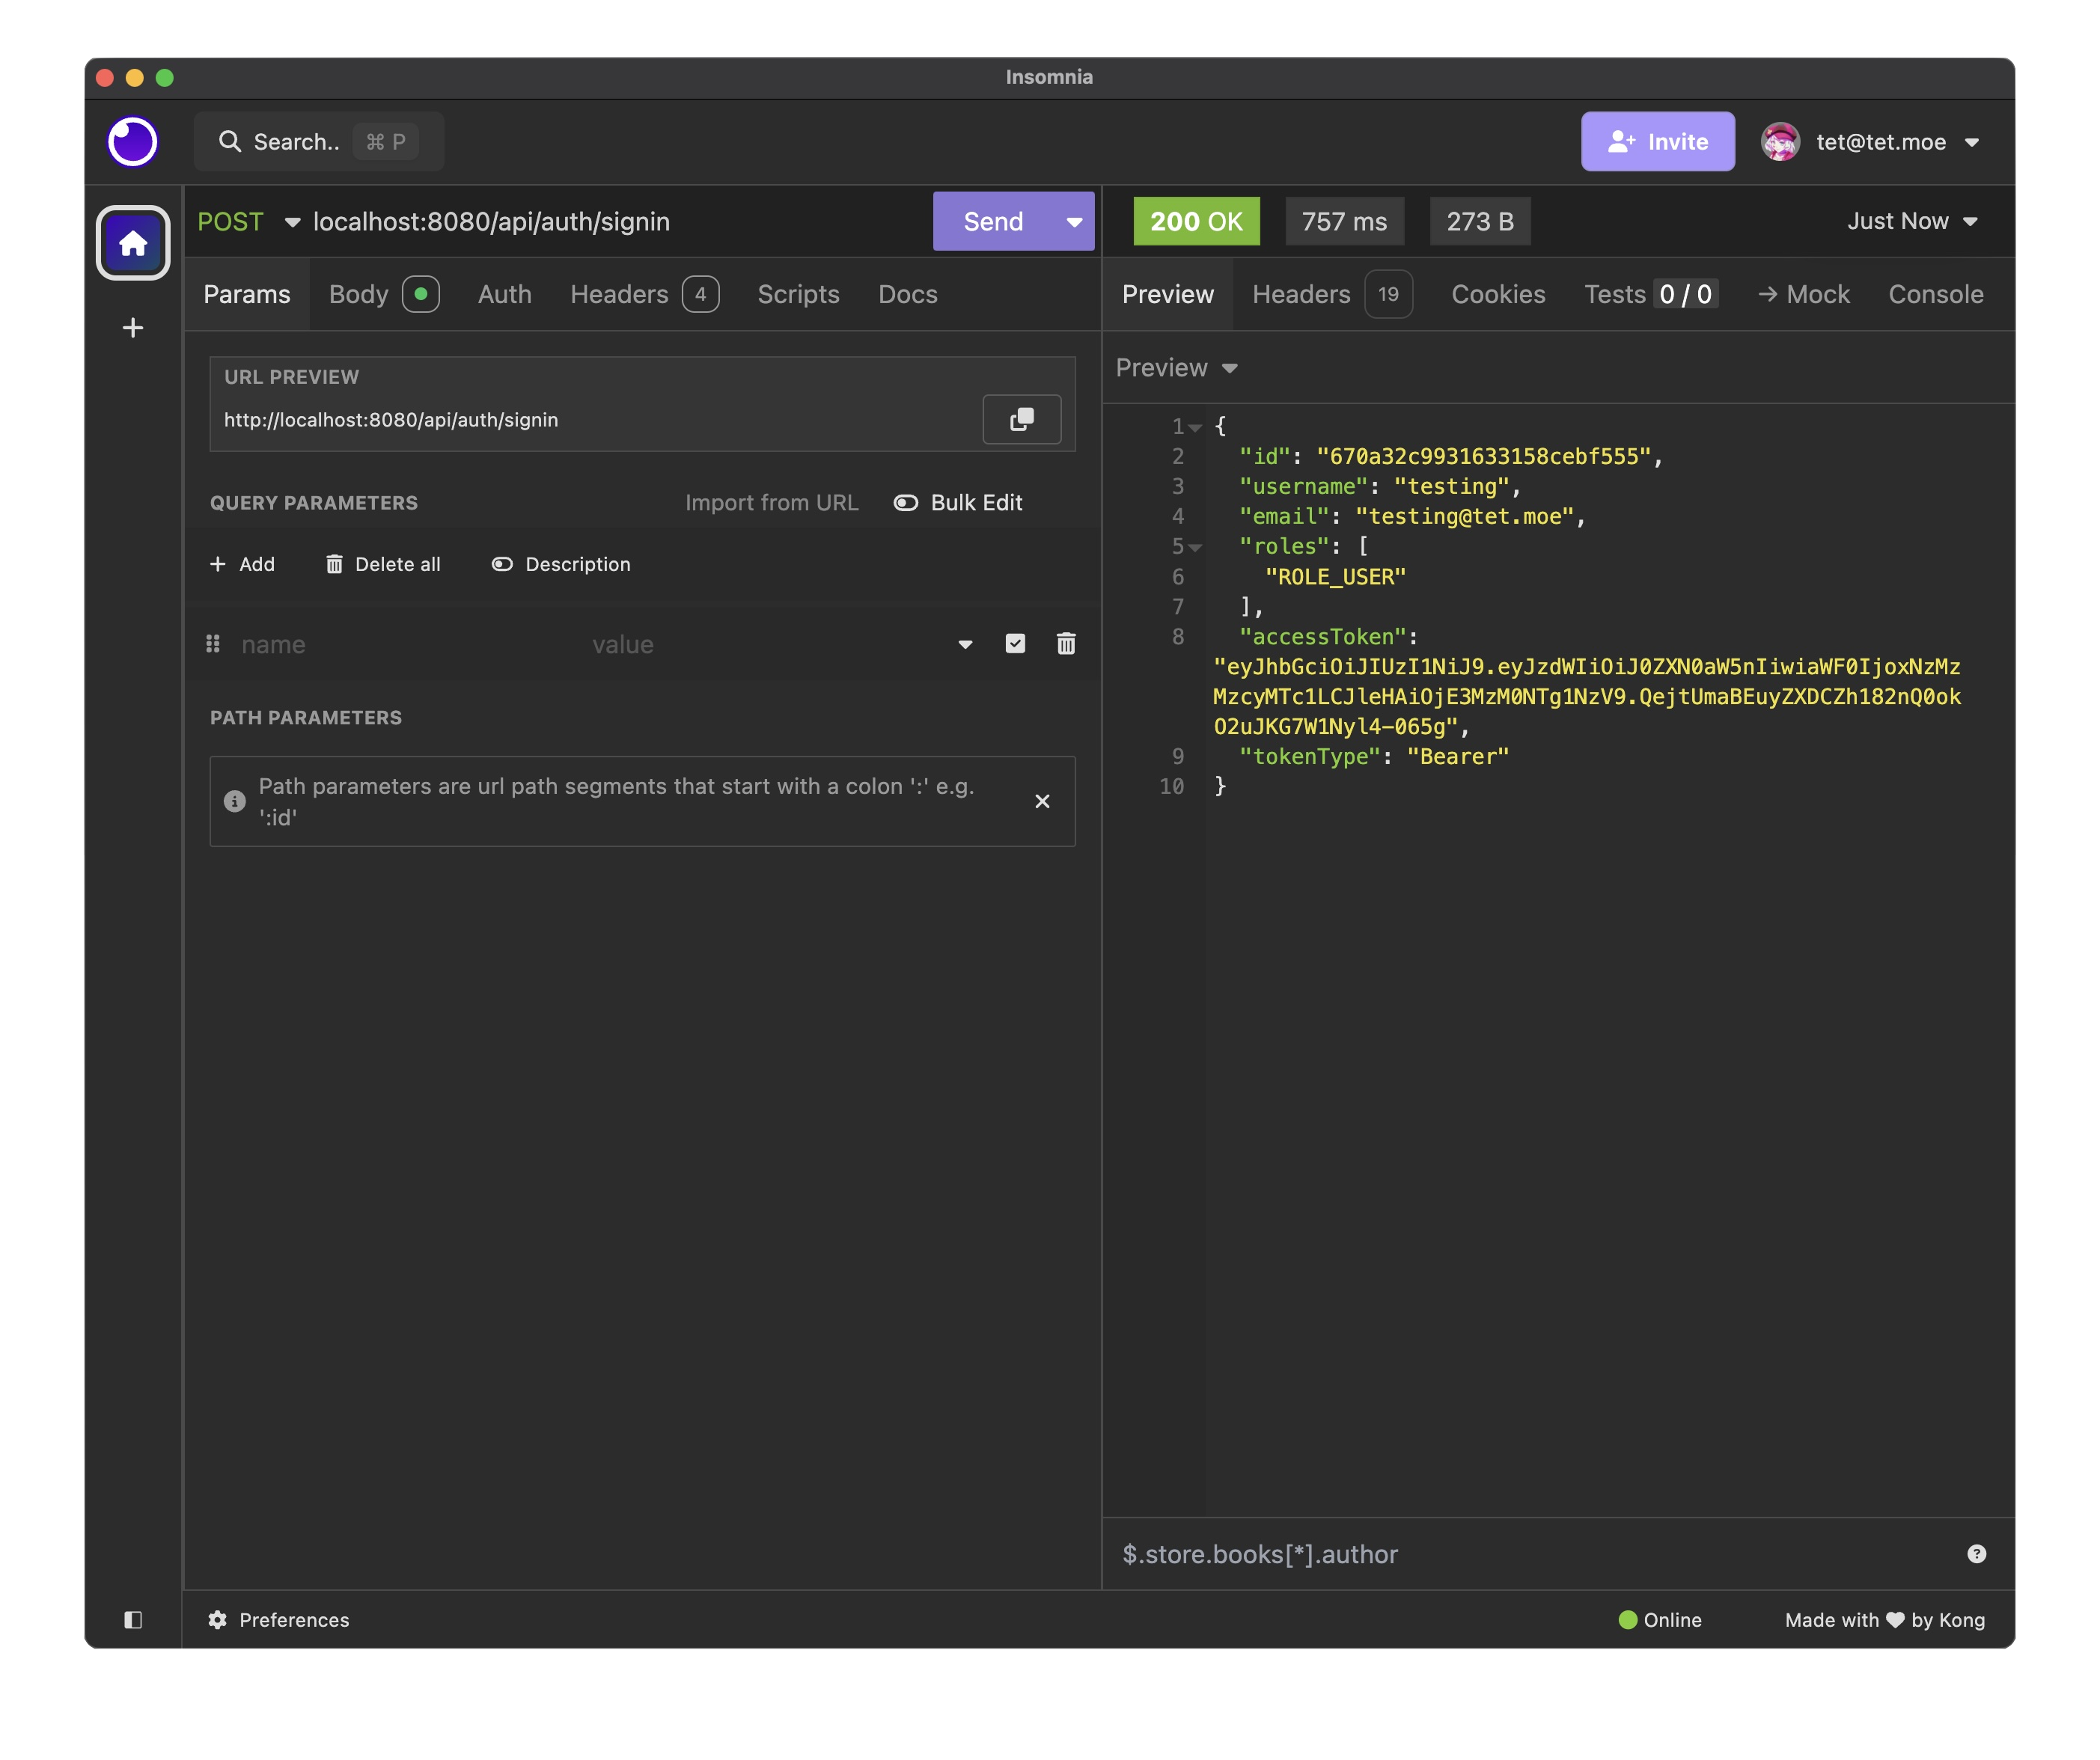
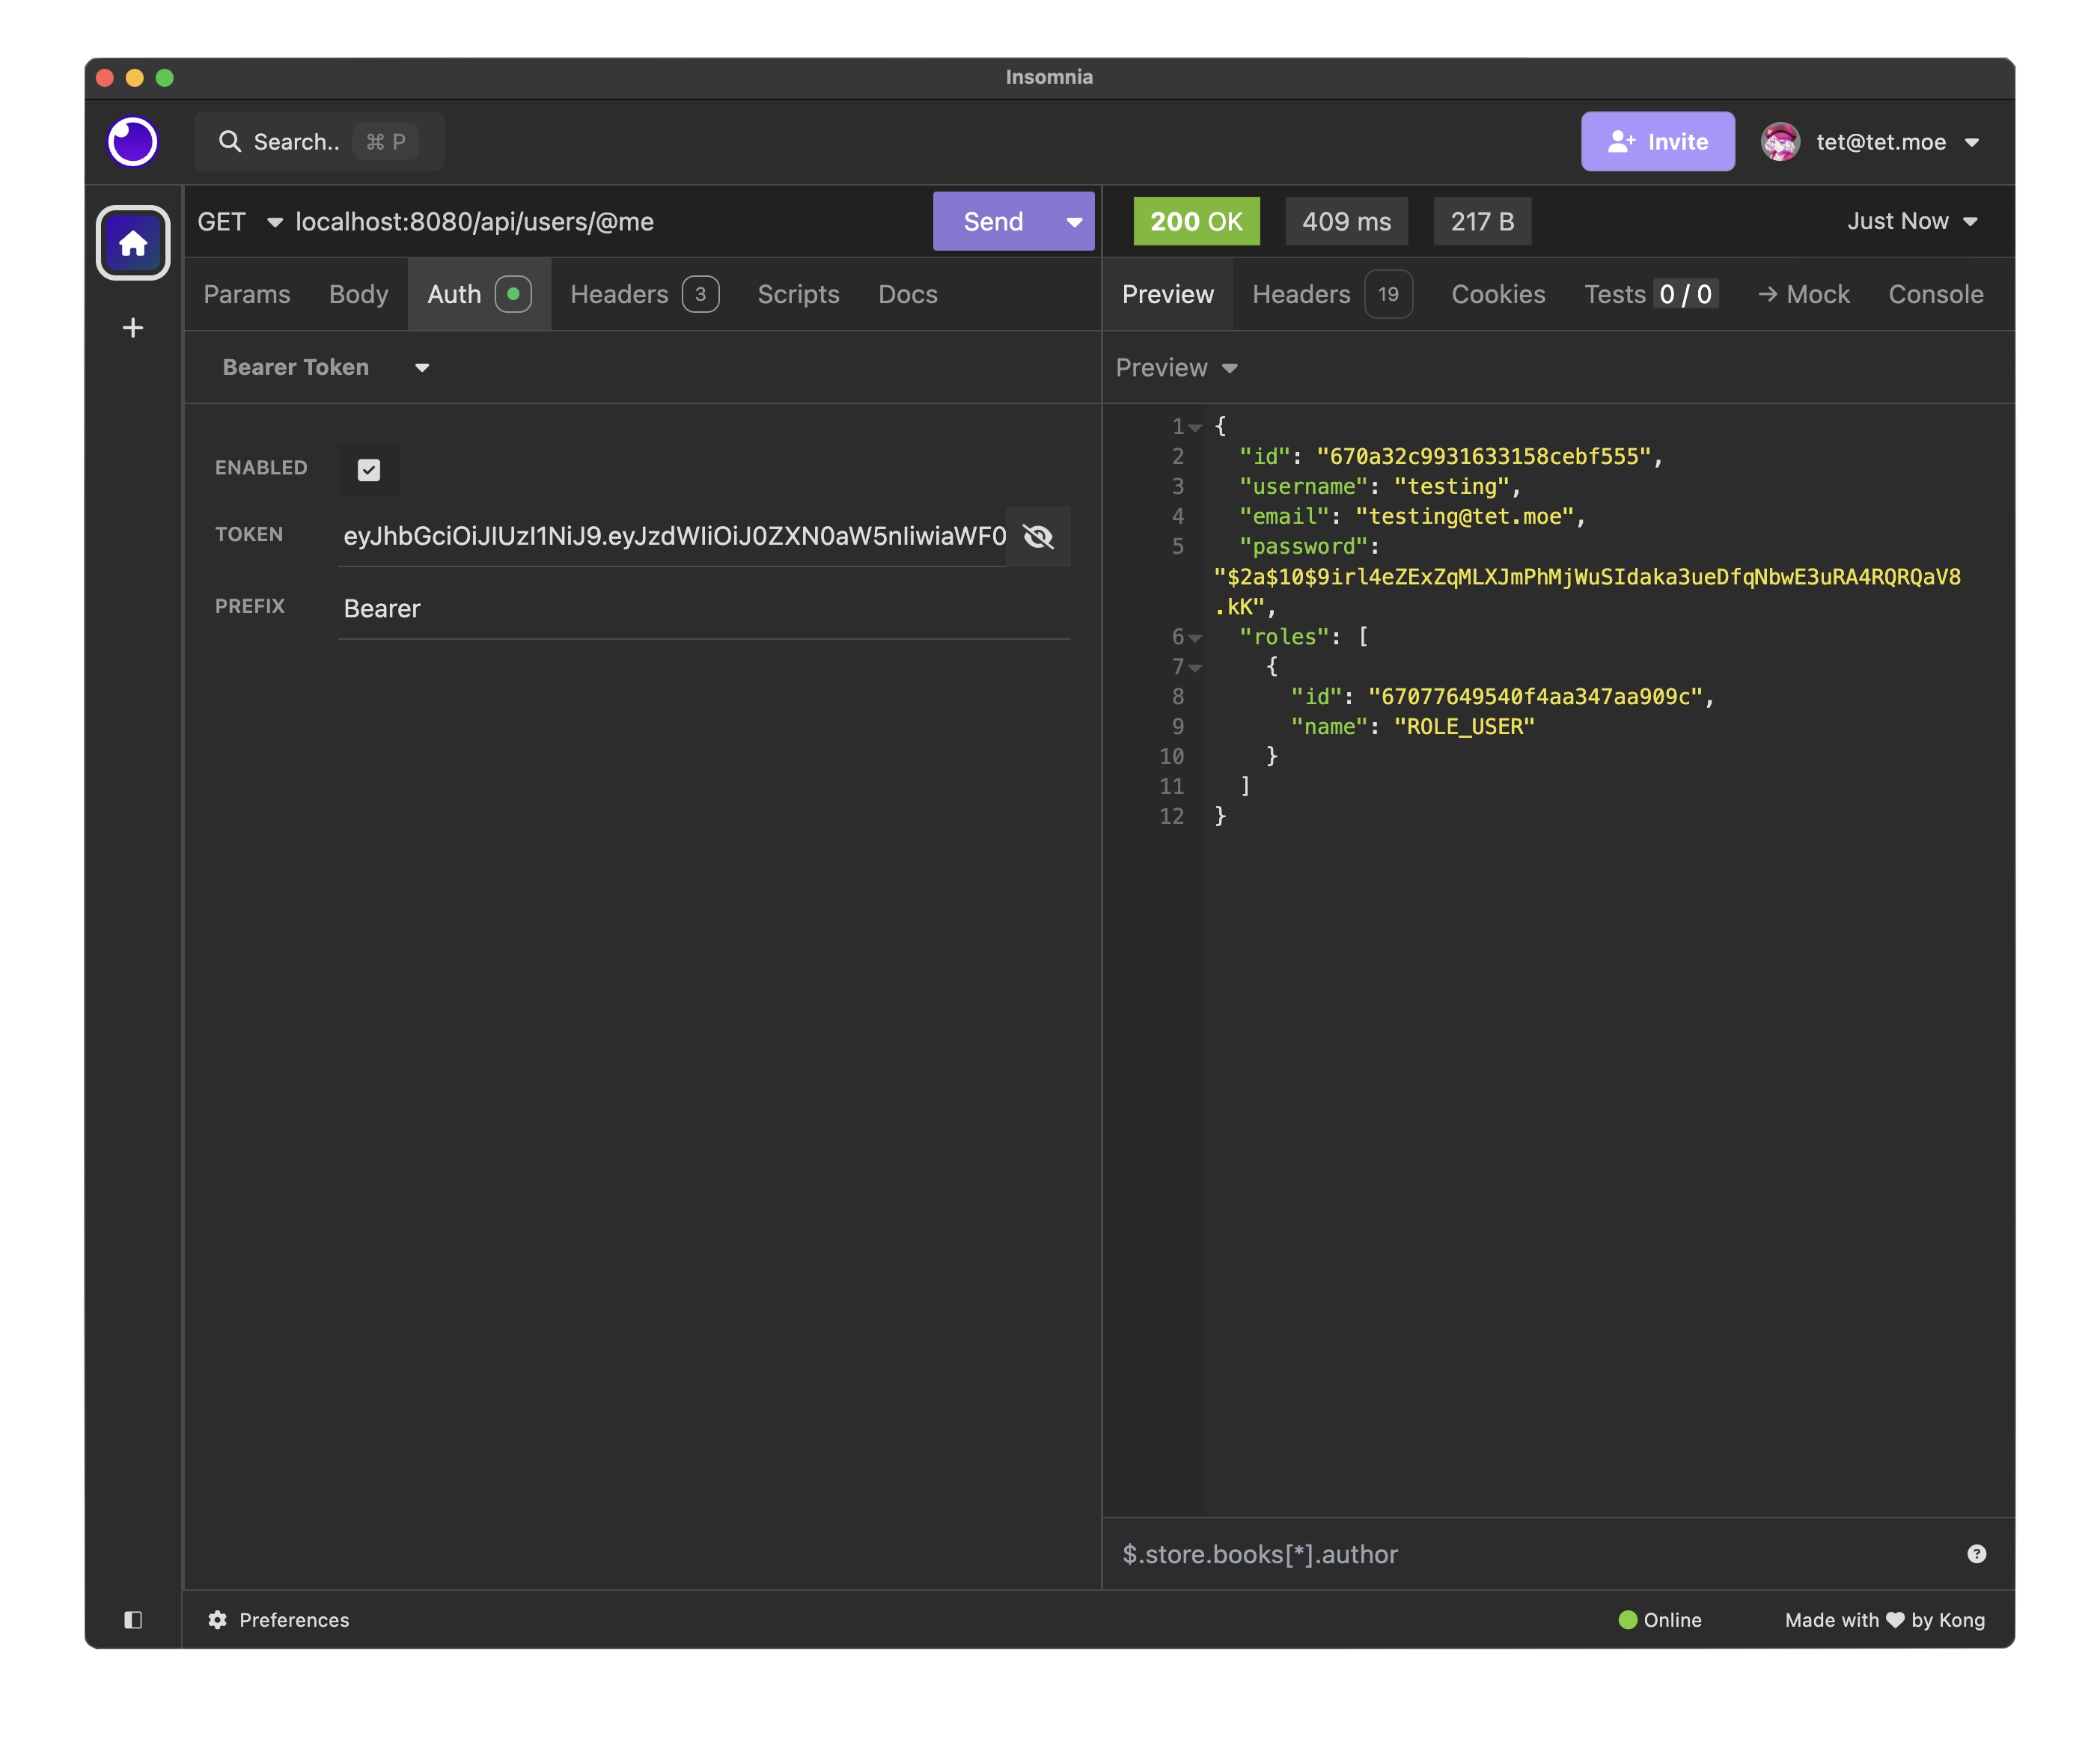
Testing the authentication and user retrieval endpoints using Insomnia (a REST client). Above is the login test, and below is the user retrieval test.
Additional Work
In addition to implementing the backend and frontend, I also began research into implementing a11y features into the application. I began by researching the best practices for creating accessible web applications and how to implement them in Next.js. At that point, there were no a11y features implemented in the application, but I planned to add them in the future. I also began researching how to deploy the application to a live server and how to set up continuous integration and deployment pipelines. I planned to deploy the application to a live server once the basic features were implemented and tested. Finally, I began researching how to implement user roles and permissions in the application. I planned to add user roles and permissions once the basic authentication and authorization logic was implemented and tested.
Phase 2 Implementation
Phase 2 Requirements
This second phase consists of implementing article creation and retrieval, as well as user roles and permissions. The requirements for this phase are as follows:
- Implement article creation and retrieval
- Implement user roles and permissions
- Each help item consists, at a minimum, of:
- a unique header including information such as the level of the article (e.g., beginner, intermediate, advanced, expert), grouping identifiers (so it is easy for the instructional team to update or delete a related set of articles), and other system information that might limit who can read the article for sensitive/restricted information
- a title
- a short description (This is like an abstract for a paper, but shorter. It is displayed when to enable the user to select which of several help items returned to read first. This is like the short text provided by a web search engine after a query.)
- a set of keywords or phrases to facilitate the search process for students
- the body of the help article
- a set of links to reference materials and related articles
- other fields may be required to make it possible to find sensitive information (e.g., a separate title and description that is free of all sensitive information) and allow the easy grouping of articles (see below).
Implementation Plan
Given the requirements, My team and I decided to focus on the following features for the second phase: - Article creation and retrieval - User roles and permissions - Article structure (header, title, description, keywords, body, links) - Grouping identifiers for articles - Article search functionality - Article grouping and categorization
To do this, we modeled the Article class to have the following fields:
type Article = {
  aId: number; // Unique identifier
  level: number; // 0 = public, 1 = private, 2 = unlisted
  groups: string[]; // Tags / categories

  createdAt: number; // Date created in epoch ms
  updatedAt: number; // Date updated in epoch ms
  title: string; // Title
  description: string; // Description in Markdown
  keywords: string[]; // Keywords for SEO

  body: string; // Body in Markdown

  links: string[]; // Links to other articles
};
As an example, here's what my article object would look like in the database. Note the body and description are in Markdown format for easy parsing and rendering.
{
  "aId": 1,
  "level": 0,
  "groups": ["Java", "Beginner"],
  "createdAt": 1634563200000,
  "updatedAt": 1634563200000,
  "title": "Introduction to Java",
  "description": "A brief introduction to Java programming",
  "keywords": ["Java", "Programming", "Beginner"],
  "body": "# Introduction to Java\n\nJava is a high-level, class-based, object-oriented programming language...",
  "links": ["https://www.oracle.com/java/"]
}
Now that we have our article model, we can move on to the implementation. Unfortunately, I was not primarily involved in the backend implementation, so I will focus on the frontend implementation for this phase.
We have decided on the following endpoints for the backend:
/api/articles- GET (Retrieve all articles), POST (Create a new article, requires authentication)/api/articles/:id- GET (Retrieve a specific article), PUT (Update a specific article), DELETE (Delete a specific article)
Now that we have our endpoints, we can move on to the frontend implementation.
Implementing the Frontend Phase 2
With Phase 2, I began by setting up the necessary components and pages for creating and retrieving articles. First, I created a general dashboard page that would display all articles to the user. This page would contain a list of articles that the user could click on to view the full article. This approach allowed me to create a simple and intuitive user interface for creating and viewing articles, which would be easy for users to navigate and use.
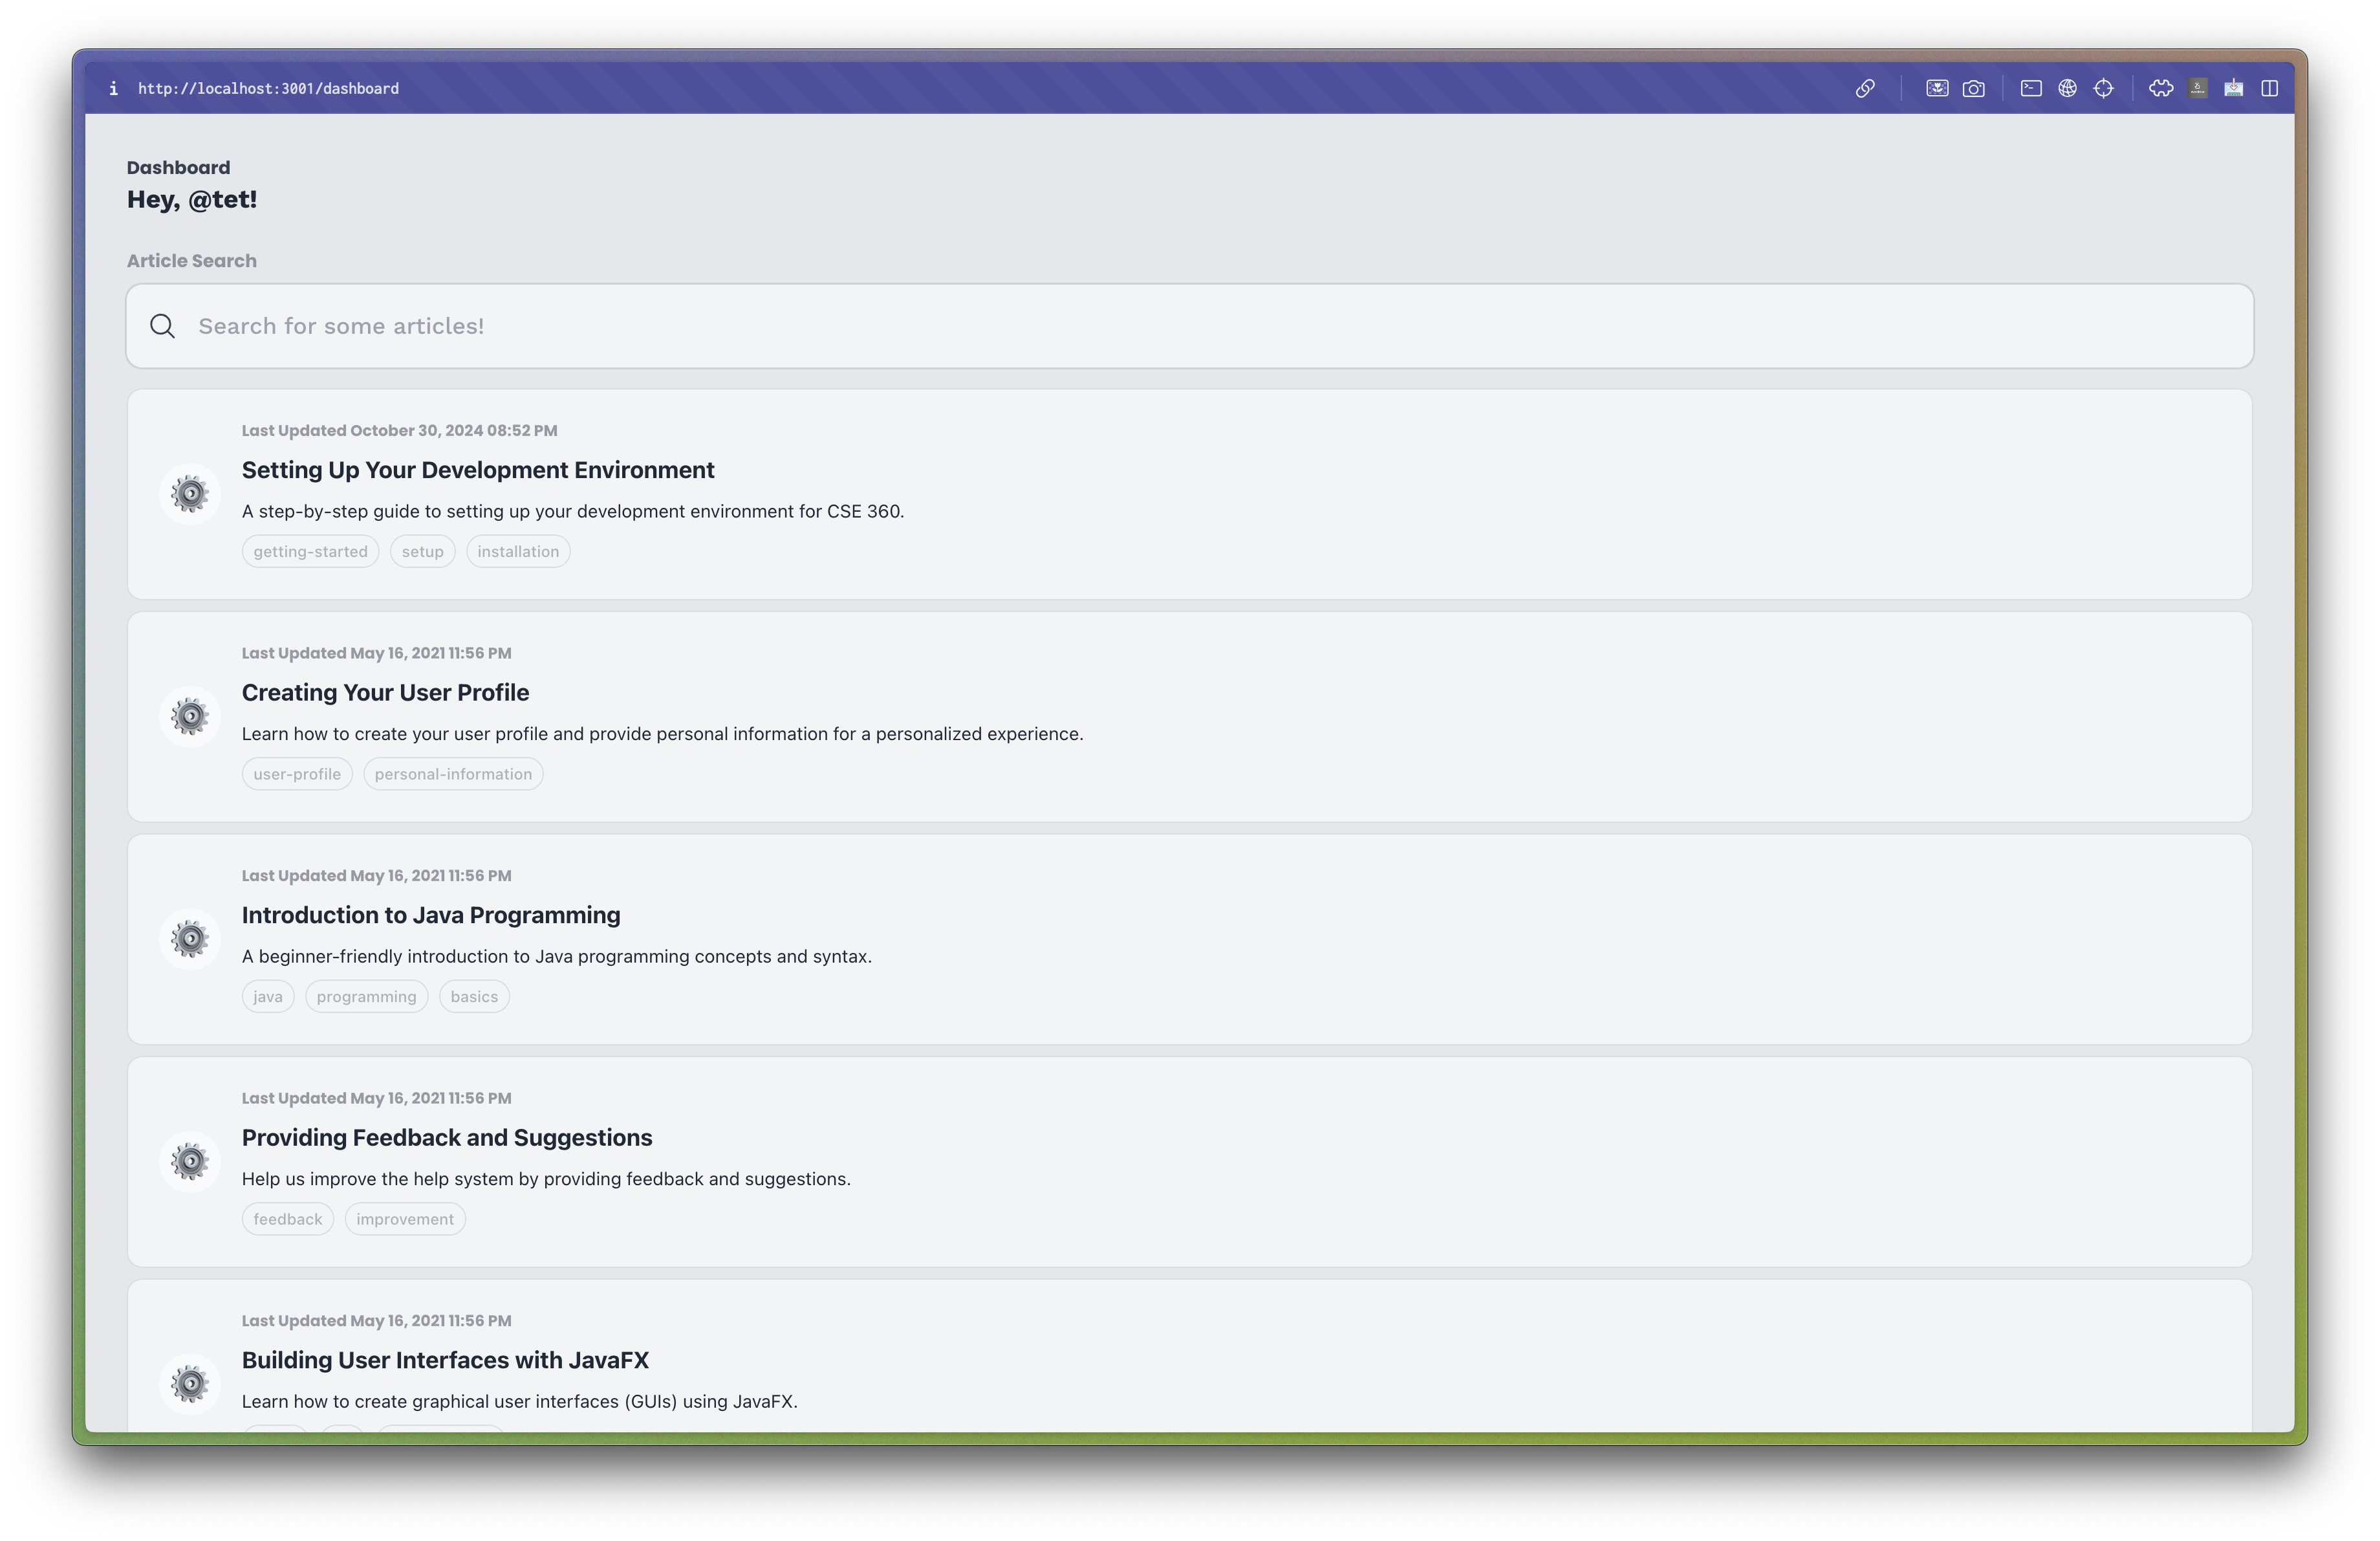
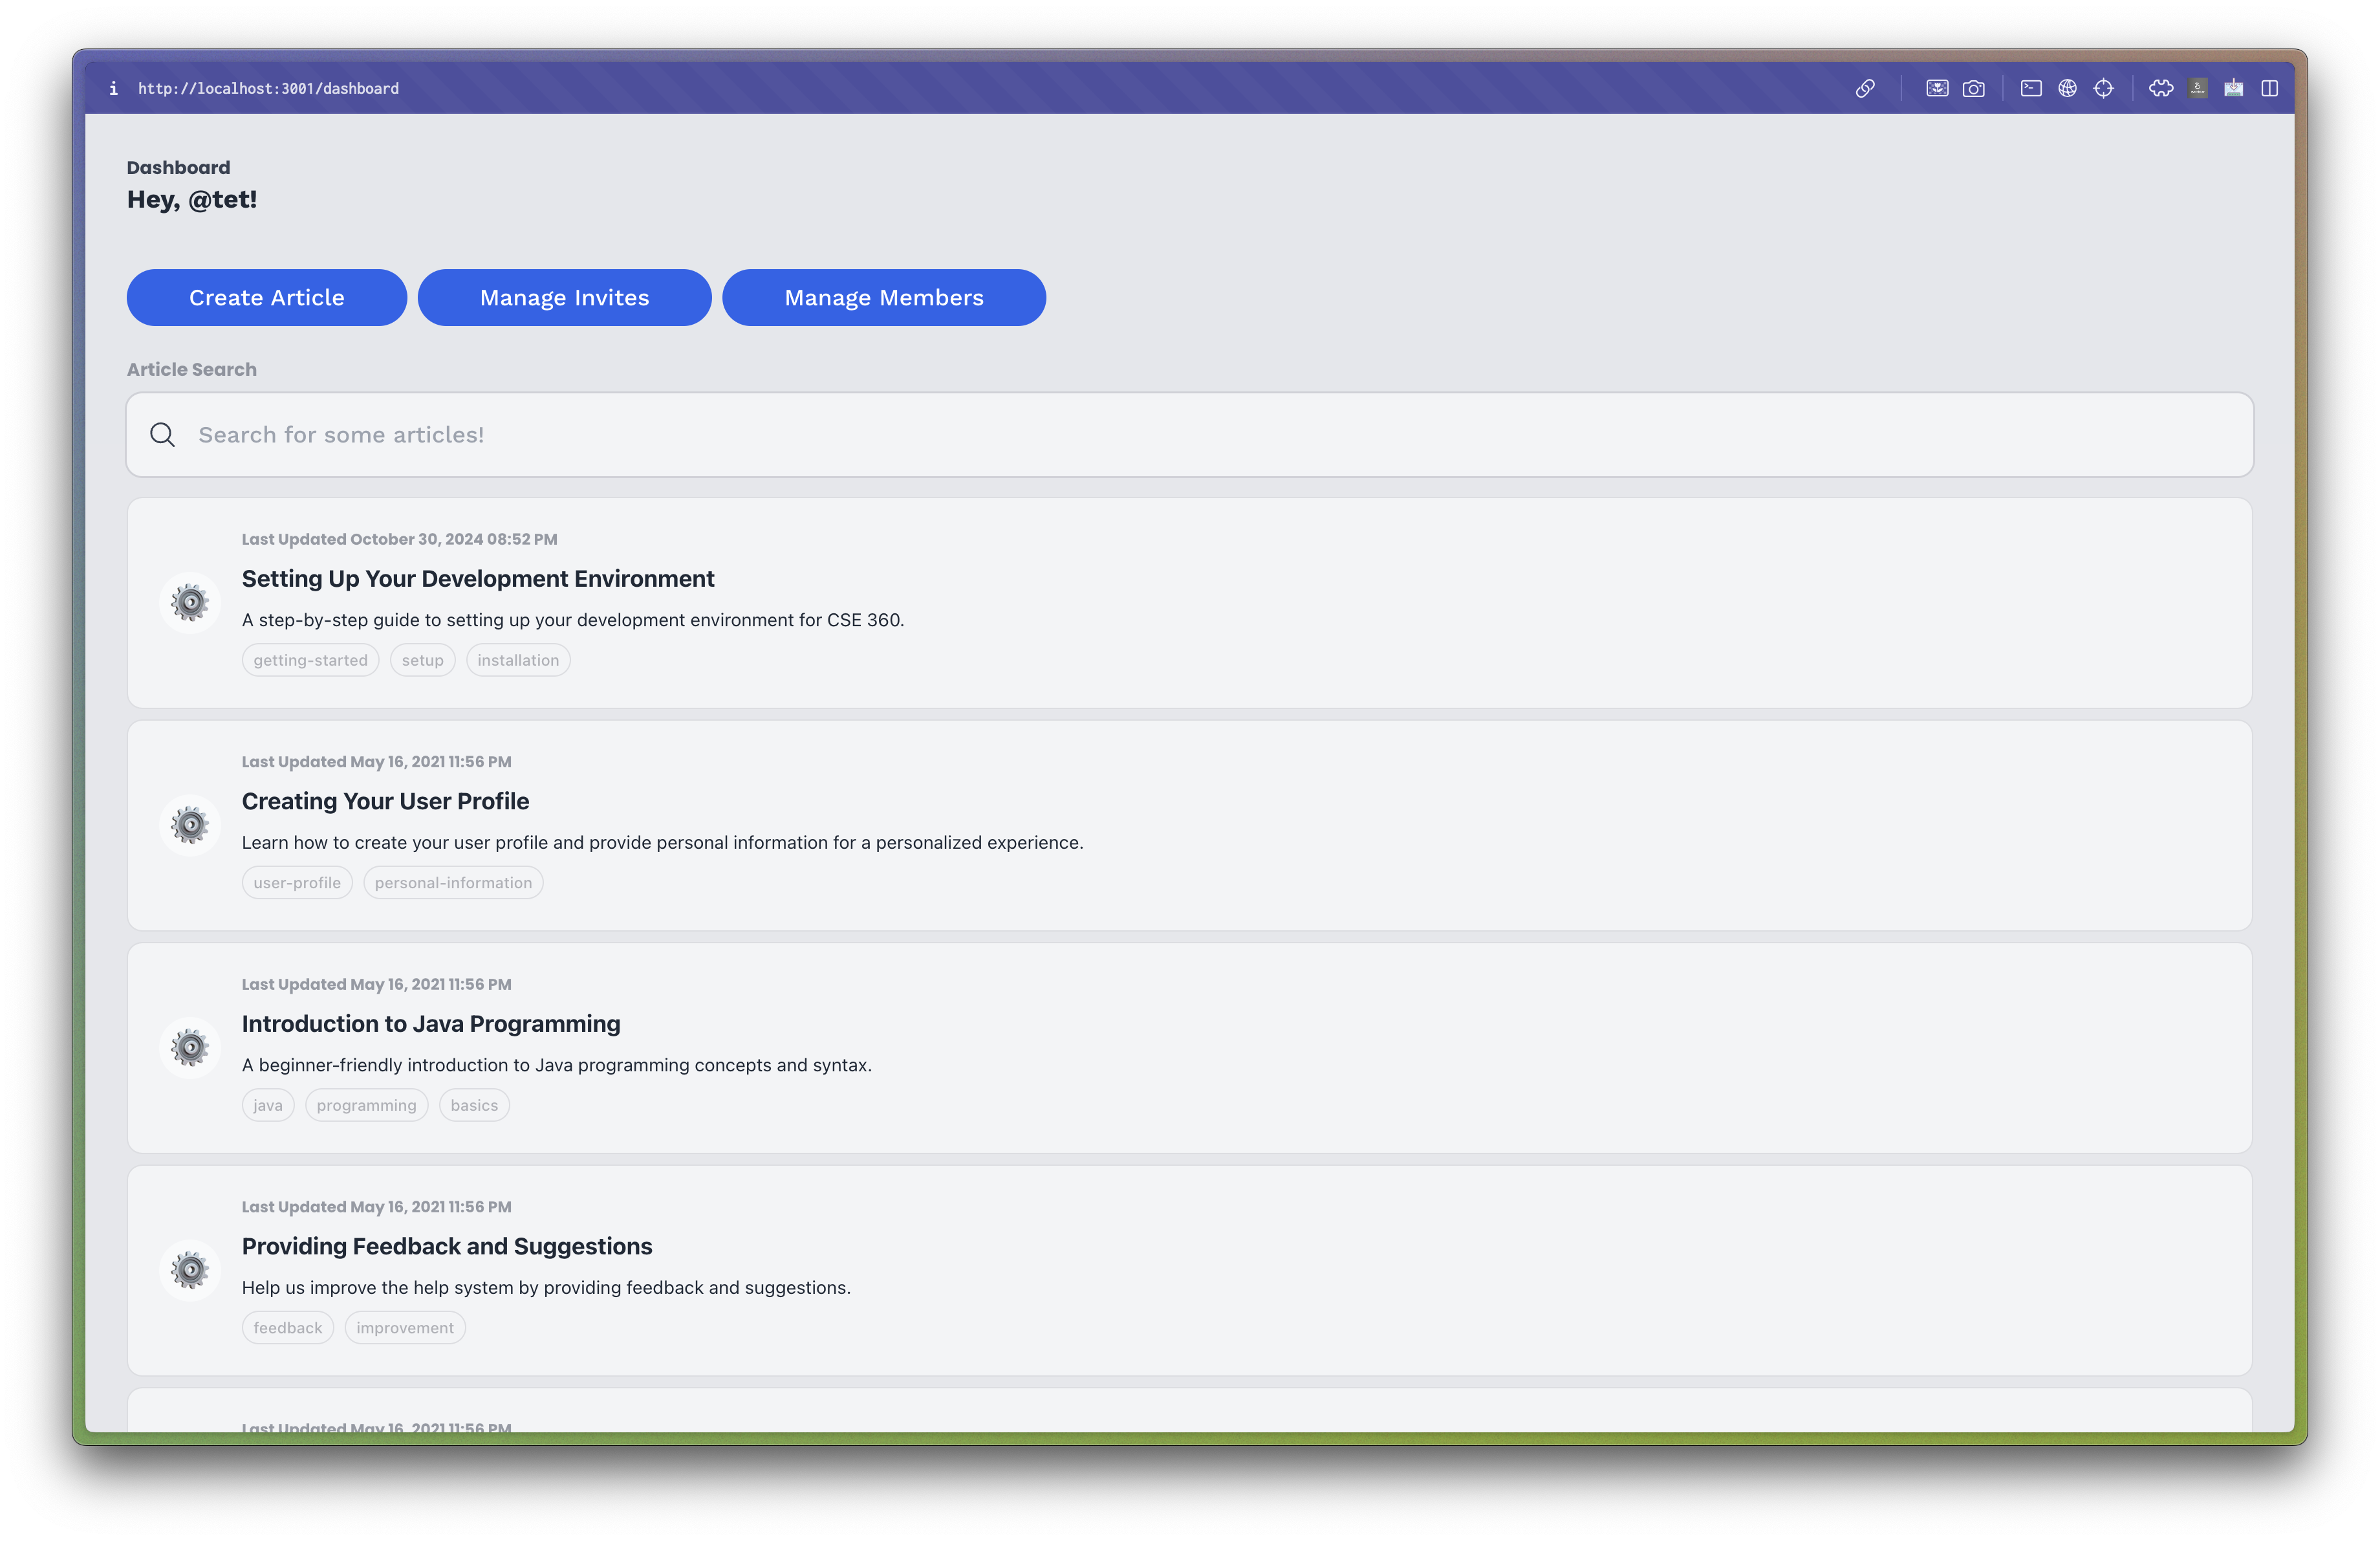
The dashboard page displaying all articles to a non-admin user (Above) and an admin user (Below).
I then created a Create Article page that would allow users with the appropriate permissions to create new articles. This page contained input fields for the article's title, description, keywords, body, and links, which the user could fill out to create a new article.
Note that only users with the appropriate permissions could access this page, as it was restricted to admin users only.
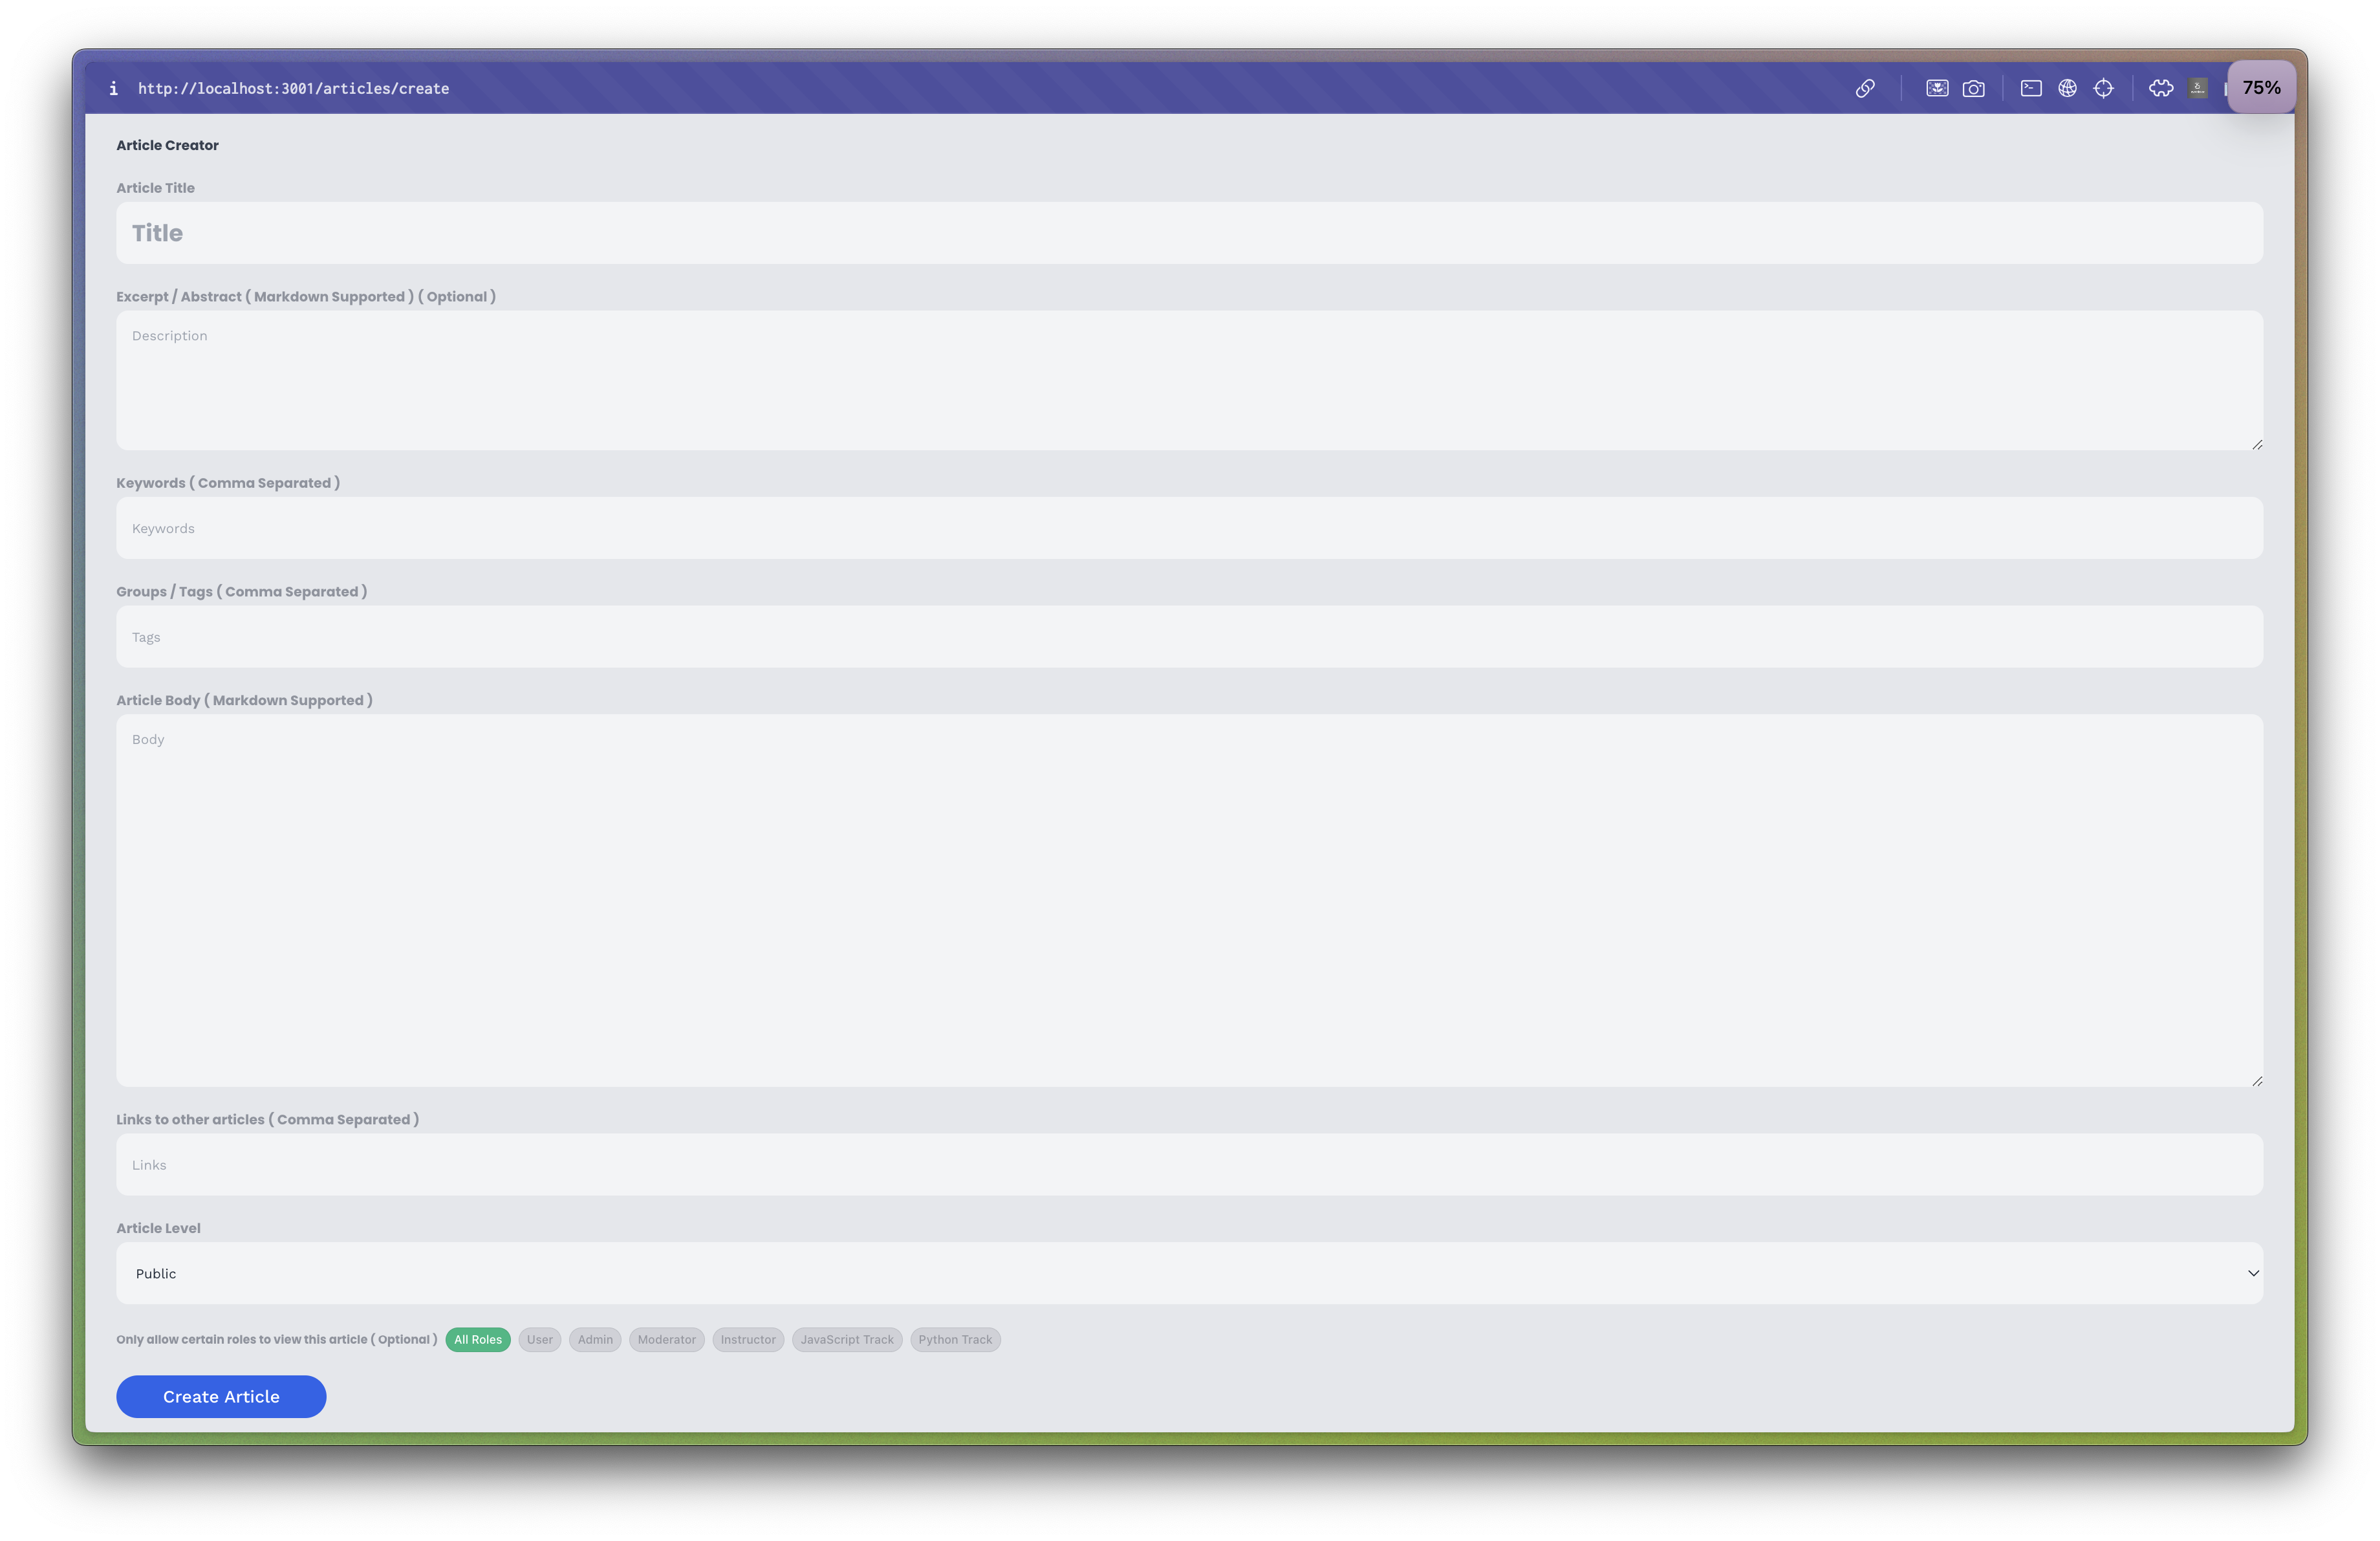
The create article page for creating new articles.
And finally, I created an Article Page that would display a specific article to the user. This page contained the article's title, description, keywords, body, and links, which the user could read to learn more about the topic. This approach allowed me to create a simple and intuitive user interface for viewing articles, which would be easy for users to navigate and use.
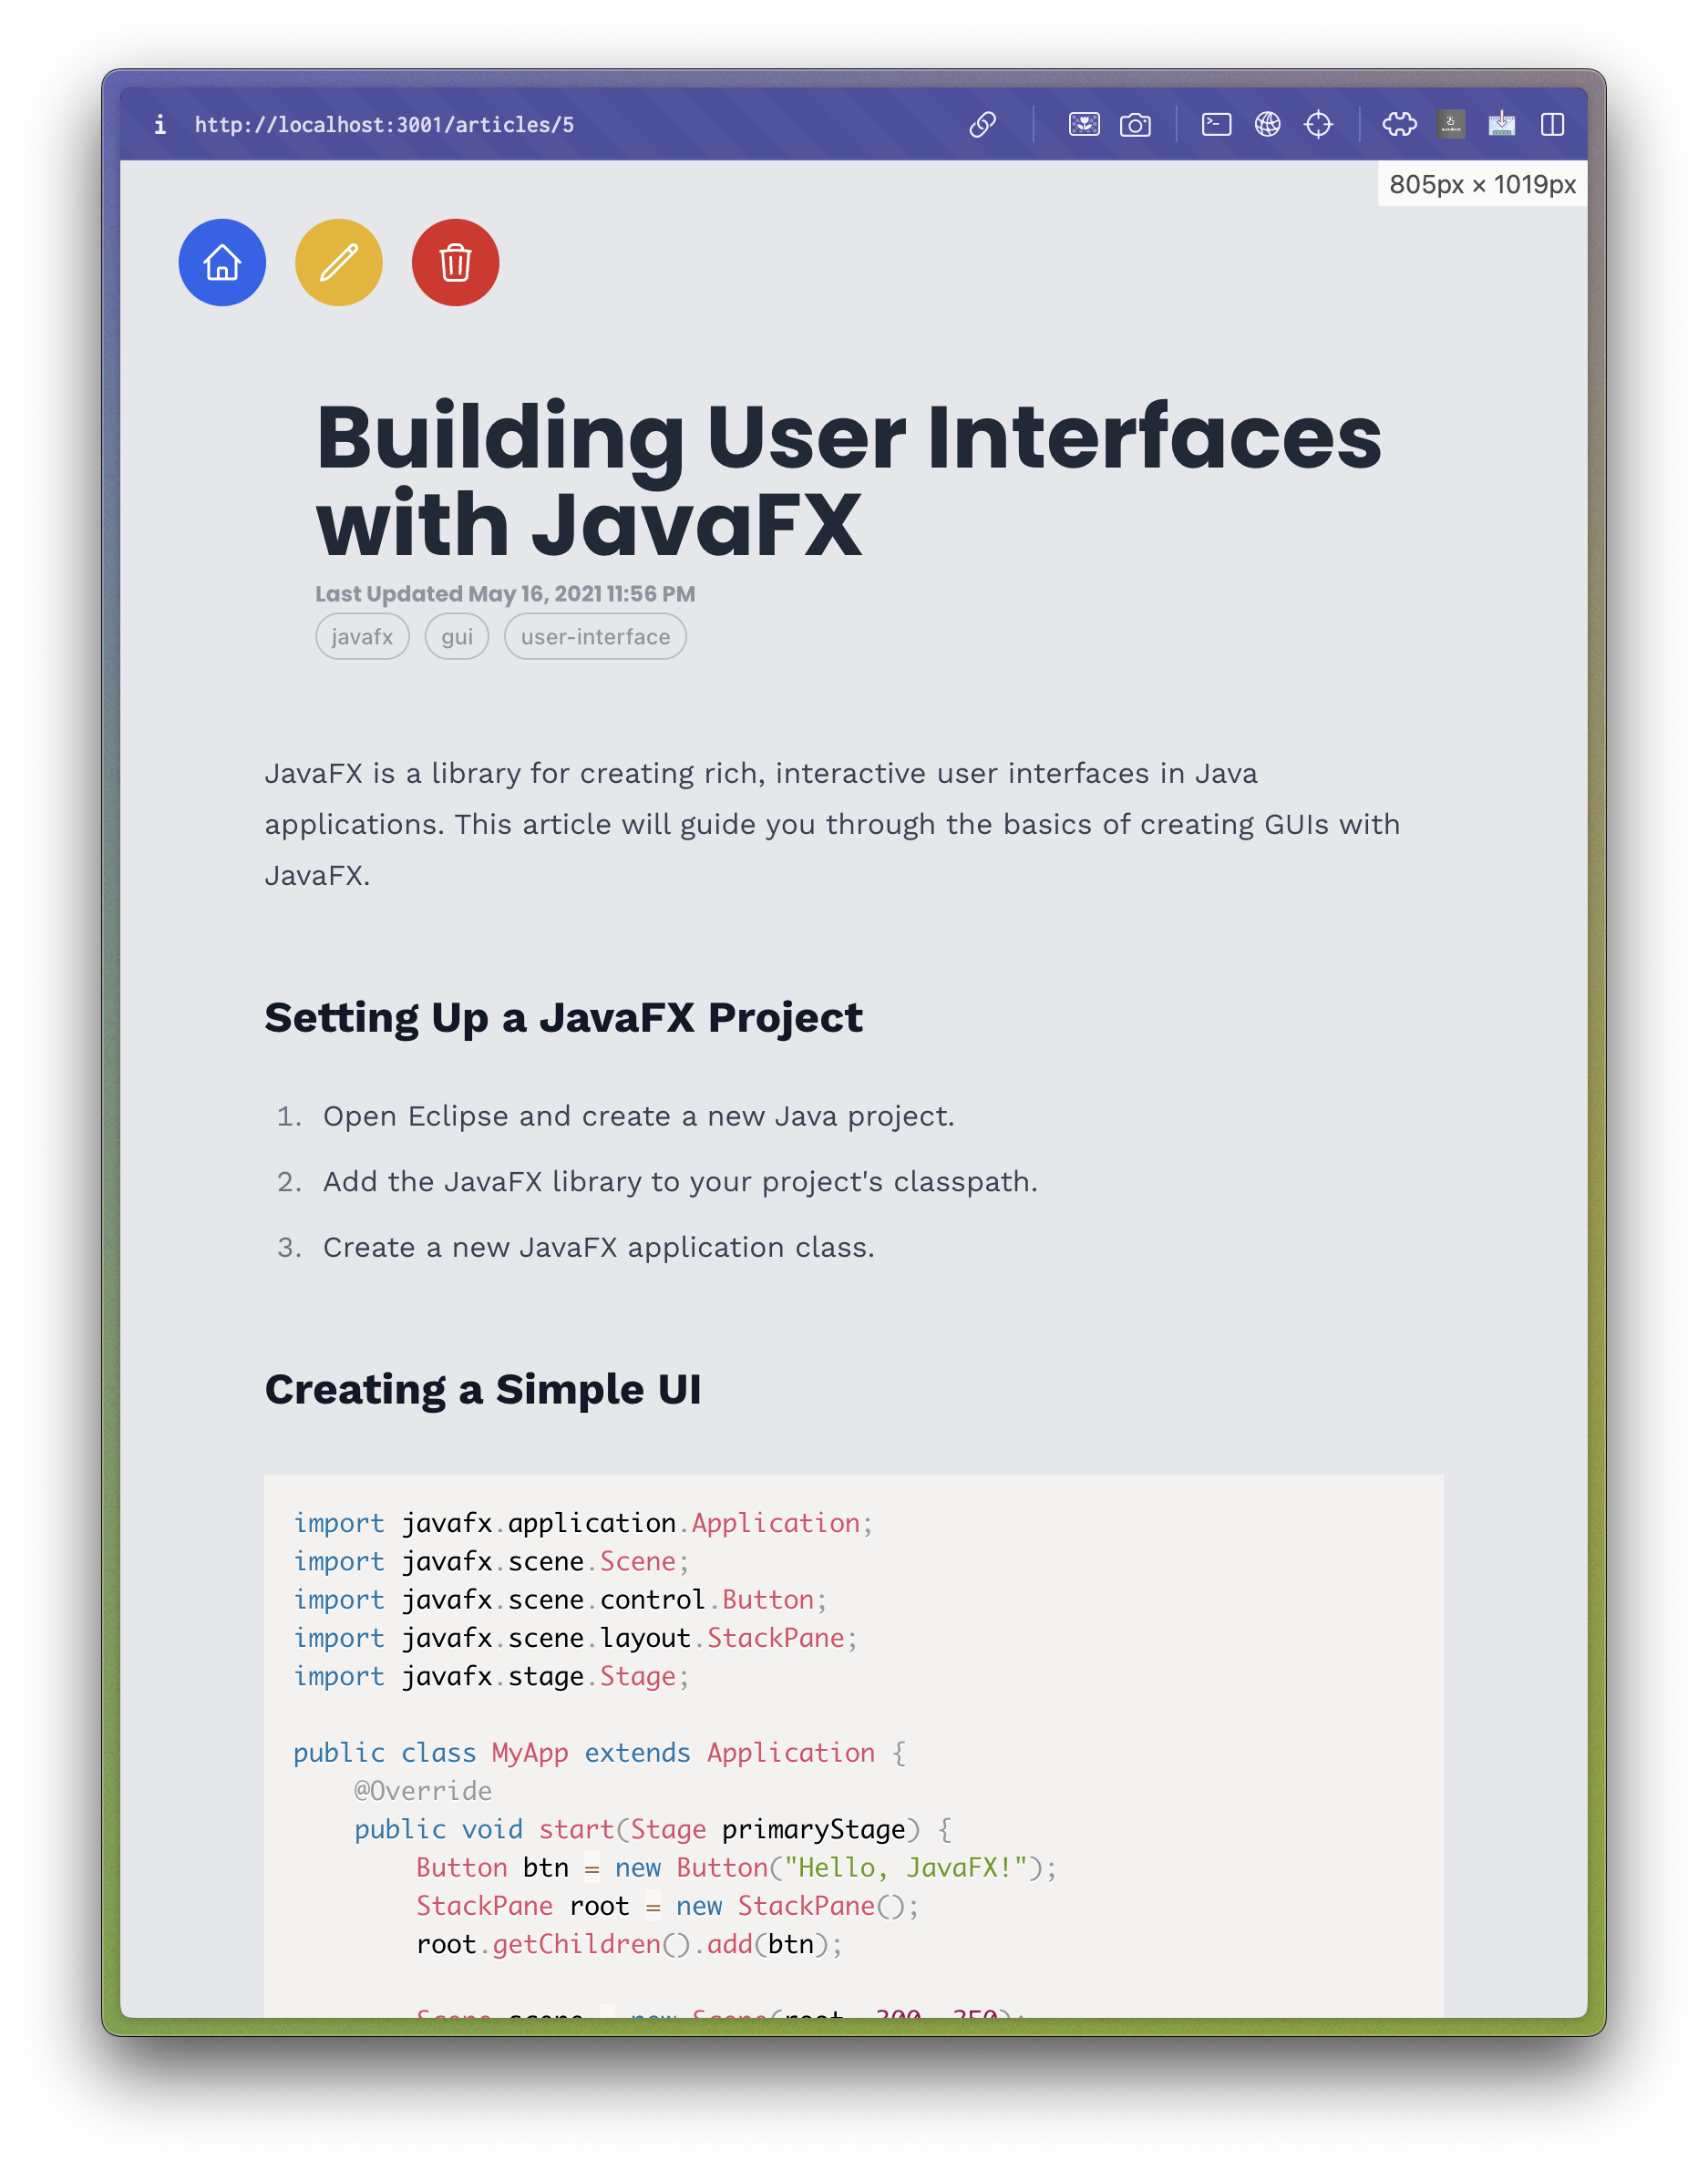
The article page displaying a specific article to the user. The Edit and Delete buttons are only visible to users with the appropriate permissions.
After creating the necessary components and pages, I focused on setting up the necessary routing and logic for creating and retrieving articles. I used Next.js's built-in routing system to create the necessary routes for the application, such as the dashboard, create article, and article pages. I then created the necessary logic and API calls to retrieve articles from the server and display them to the user. This approach allowed me to create a simple and intuitive user interface for creating and viewing articles, which would be easy for users to navigate and use.
To boost efficiency, I also implemented Server-Side Rendering (SSR) for the article pages. This approach allowed me to pre-render the pages on the server and send the HTML to the client, which significantly improved the page load times and user experience. By using SSR, I was able to create a fast and responsive user interface that would provide users with a seamless browsing experience.
Implementing Delete and Edit functionality was also a priority. I created a simple modal that would confirm the user's intent to delete an article. If the user confirmed, the article would be deleted from the database, and the user would be redirected to the dashboard page. The Edit functionality was similar, copying the article's data into the Create Article page for the user to edit and save.

The article edit page for editing existing articles.
Search functionality was also implemented, allowing users to search for articles based on keywords. I utilized the Fuse.js library to implement fuzzy search, which allowed users to search for articles even if they misspelled a keyword. This approach improved the user experience and made it easier for users to find the information they were looking for.
export const useFuzzyArticleSearch = (articles: Article[], query: string) => {
  // State to store the filtered results
  const [results, setResults] = useState<Article[]>(articles);

  useEffect(() => {
    // Configuration for the fuzzy search
    // Expanded set of searchable fields compared to the default options
    const fuseOptions = {
      includeScore: false,
      keys: [
        "title", // Article title
        "tags", // Article tags/categories
        "description", // Article description/summary
        "keywords", // Article keywords
        "body", // Main article content
        "links", // Related links/references
      ],
    };

    // Initialize Fuse instance with articles and search options
    const fuse = new Fuse(articles, fuseOptions);

    // If query is empty, return all articles
    if (query === "") {
      setResults(articles);
    } else {
      // Perform fuzzy search and map results to return only the matched articles
      setResults(fuse.search(query).map(({ item }) => item));
    }
  }, [articles, query]); // Re-run effect when articles or query changes

  return results;
};
The implementation of the frontend for Phase 2 was a significant step forward in the development of the help system. By creating the necessary components, pages, and logic for creating and retrieving articles, I was able to provide users with a simple and intuitive user interface for accessing help articles. The implementation of SSR, delete and edit functionality, and search functionality further improved the user experience and made it easier for users to find the information they were looking for. With the frontend now implemented, I could move on to integrating the frontend and backend and testing the application as a whole.
Additional Work (Implementing ARIA Labels)
In addition to implementing the basic features, I also began the implementation of ARIA labels. ARIA labels are used to provide additional information to screen readers and other assistive technologies, making the application more accessible to users with disabilities. I implemented ARIA labels in the application by adding them to the necessary components and elements, such as buttons, links, and form fields. This approach allowed me to create a more accessible user interface that would provide users with a better browsing experience. I also began researching how to implement user roles and permissions in the application. I planned to add user roles and permissions once the basic authentication and authorization logic was implemented and tested.
 <input
type="username"
placeholder="username"
className="basicinput"
value={username}
onChange={(e) => setUsername(e.target.value)}
disabled={loading}
/>
{/* Password input */}
<input
type={"password"}
placeholder="Password"
className="basicinput"
value={password}
onChange={(e) => setPassword(e.target.value)}
disabled={loading}
/>
{/* Login button */}
<button
className={`btn-primary mt-4 disabled:opacity-50`}
onClick={verifyForm}
disabled={loading}
>
Login
</button>
The login form before ARIA labels were implemented.
<input
    id="username"
    type="text"
    placeholder="Username"
    className="basicinput"
    value={username}
    onChange={(e) => setUsername(e.target.value)}
    disabled={loading}
    aria-label="Username"
/>
<label htmlFor="password" className="sr-only">
    Password
</label>
<input
    id="password"
    type="password"
    placeholder="Password"
    className="basicinput"
    value={password}
    onChange={(e) => setPassword(e.target.value)}
    disabled={loading}
    aria-label="Password"
/>
{/* Login button */}
<button
    className={`btn-primary mt-4 disabled:opacity-50`}
    onClick={verifyForm}
    disabled={loading}
    aria-label="Login"
>
    Login
</button>
The login form after ARIA labels were implemented.
An example of implementing ARIA labels in the login form.
After implementing ARIA labels, I tested the application using a screen reader to ensure that the labels were being read correctly. I also tested the application using other assistive technologies to verify that the labels were being used as intended. After the implementation, you can see the difference in the user experience, making the application more accessible to users with disabilities.
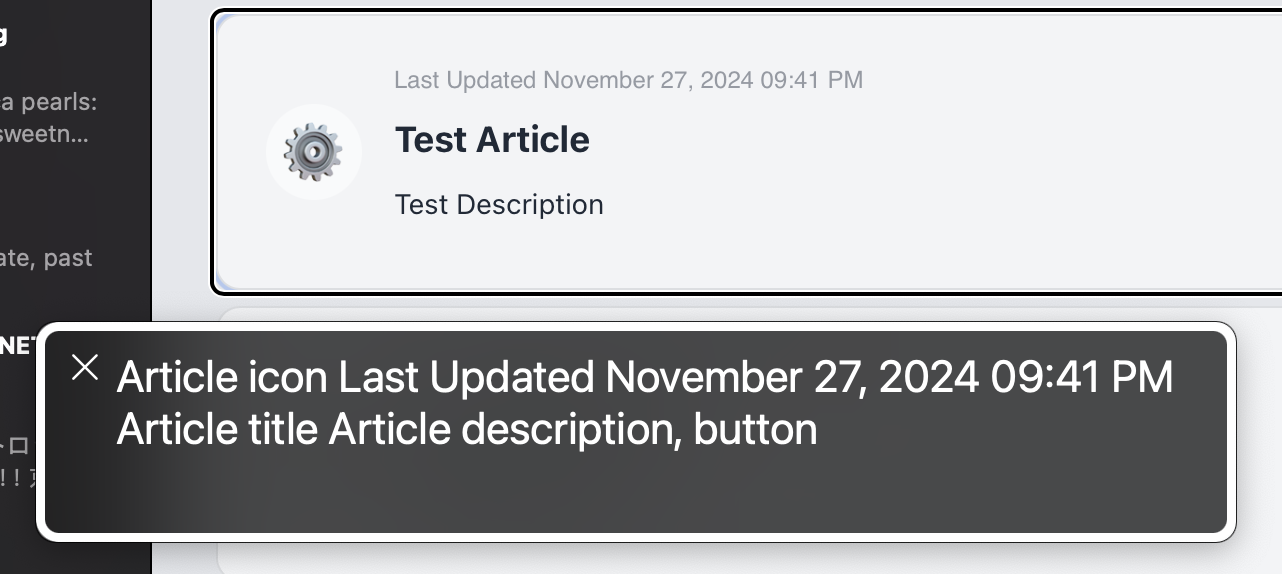

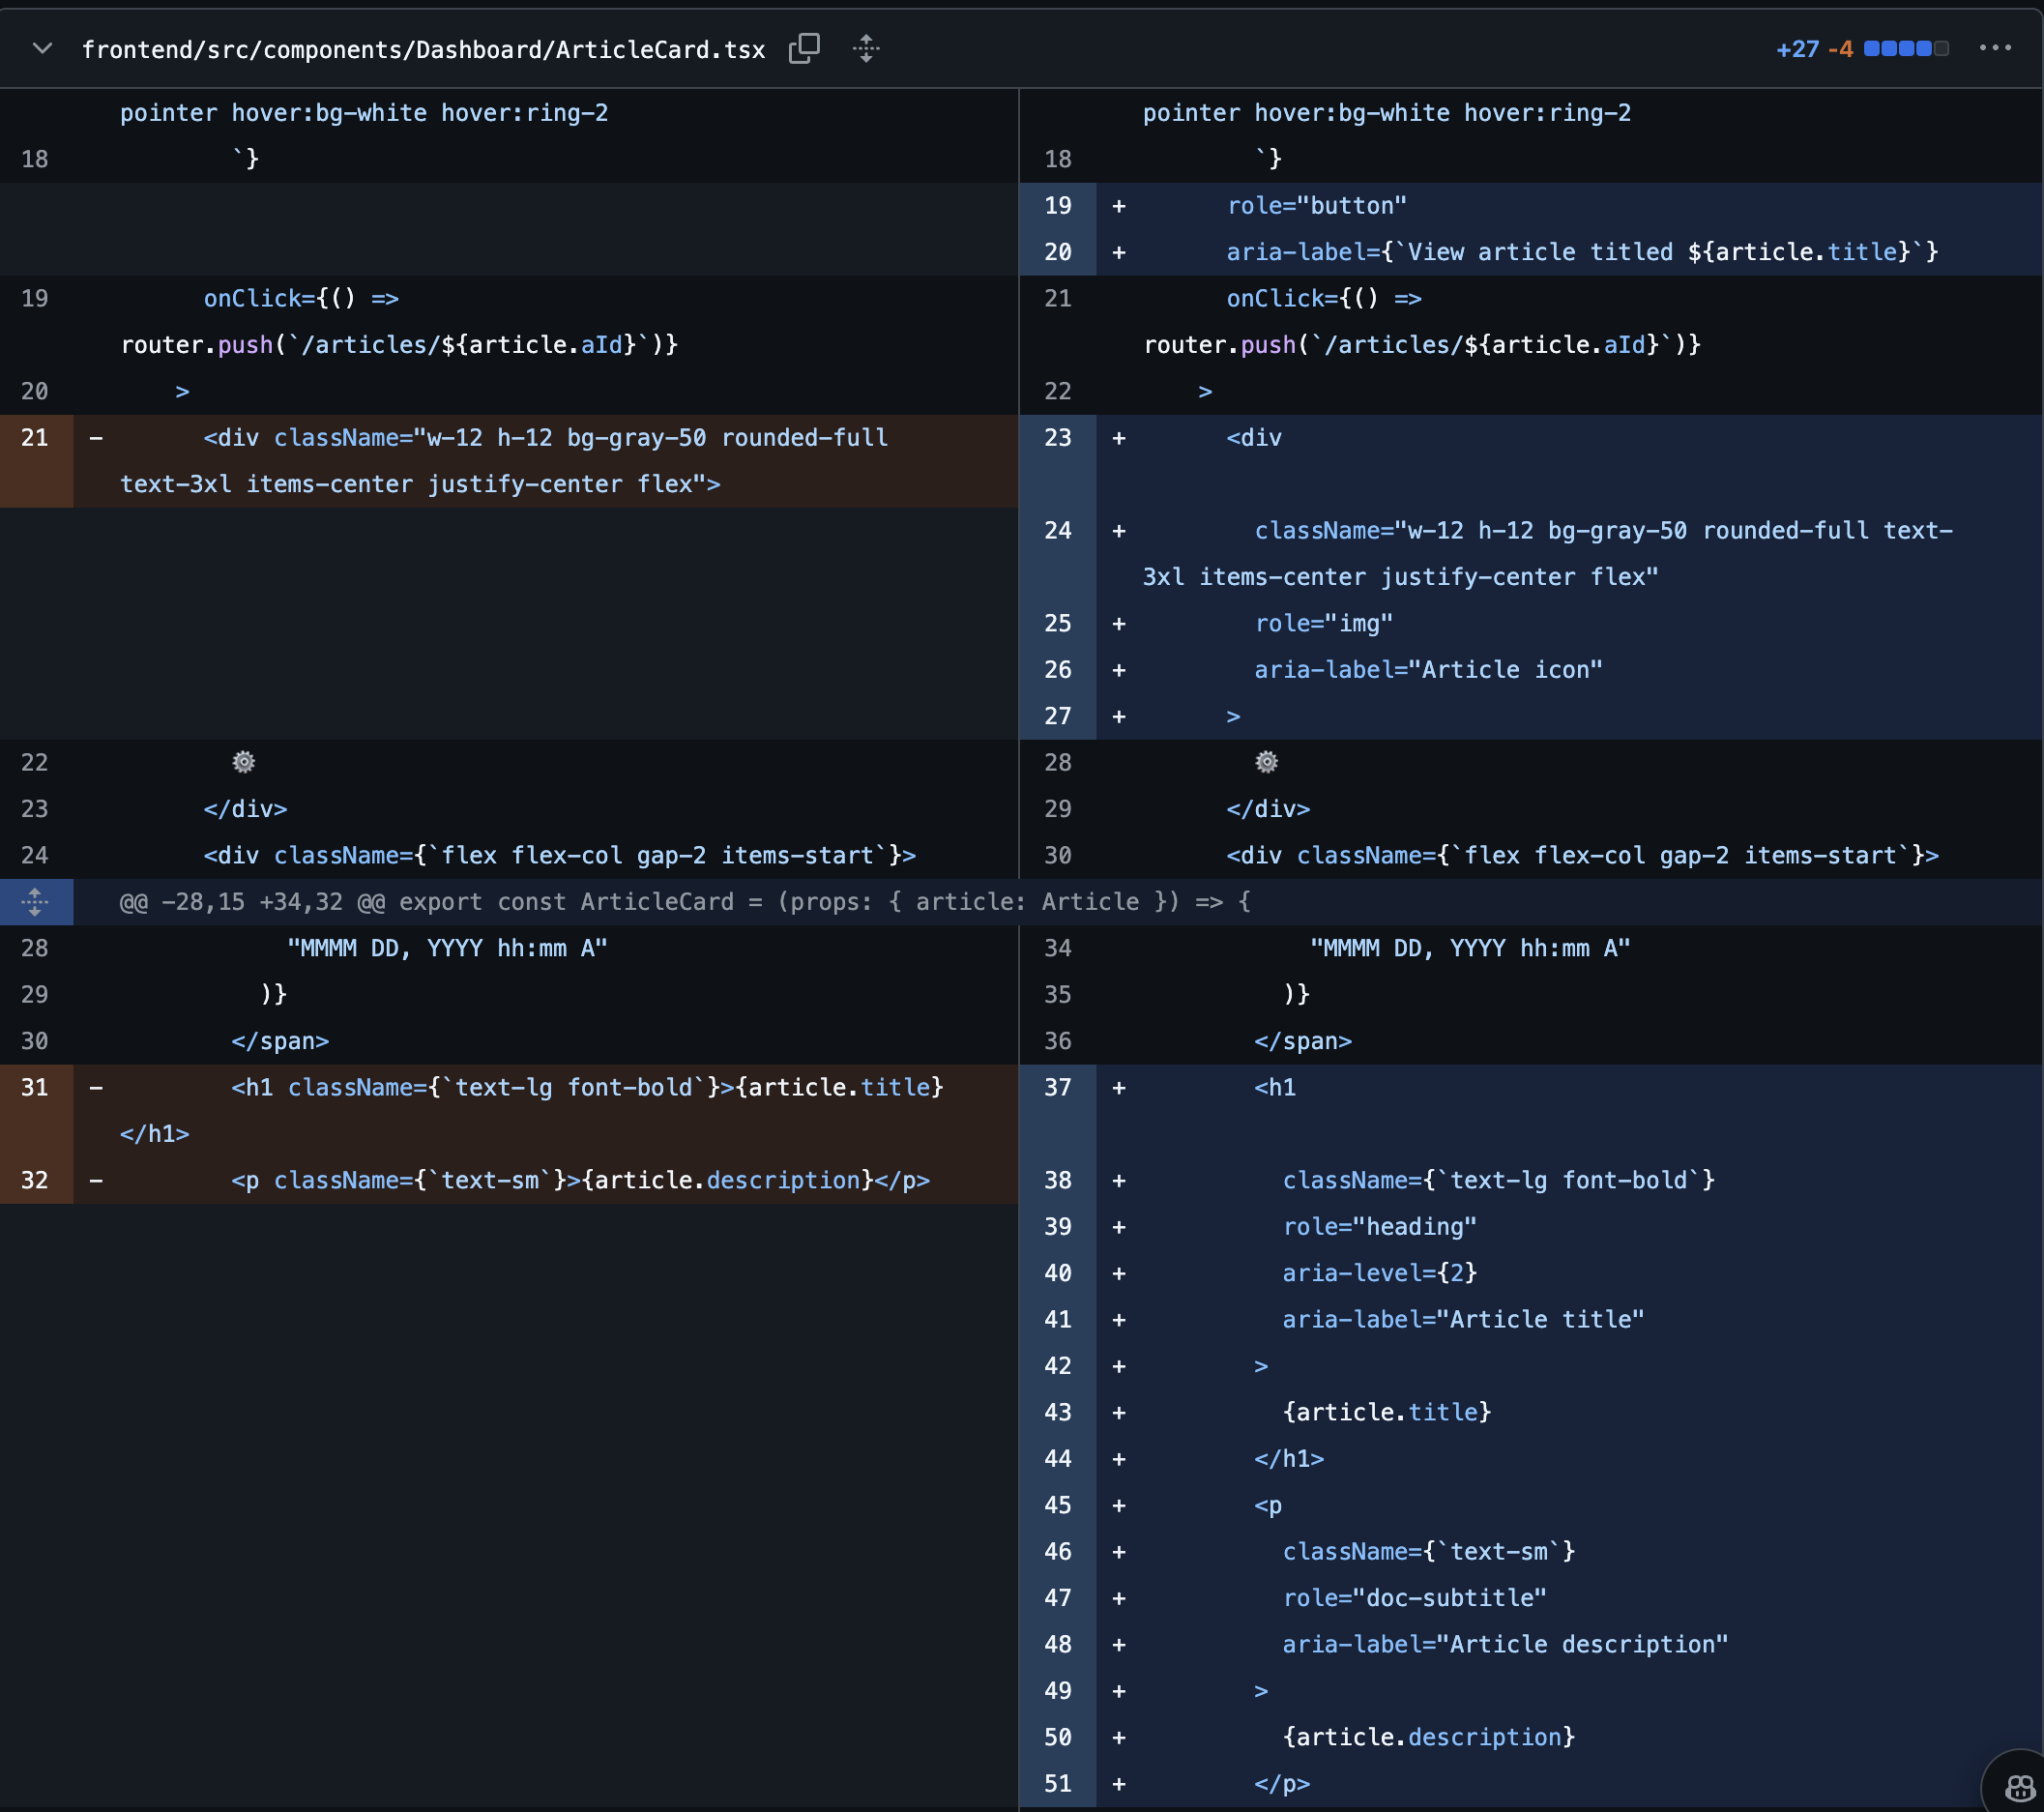
An article card without ARIA support (Above) and with ARIA support (Below).
As you can see, the implementation of ARIA labels significantly improved the user experience for users with disabilities, making it actually usable with a screen reader. This was a crucial step in making the application more accessible and inclusive to all users. With the implementation of ARIA labels complete, I can now move on to further polishing the application and preparing it for deployment.
Phase 3 Implementation
Phase 3 Requirements
The third phase focuses on enhancing the help system with special access groups and enhanced student/instructor interactions. The key requirements are:
- Support for special access groups with encrypted article content
- Enhanced student role capabilities including:
- Ability to send generic and specific help messages
- Content level filtering (beginner, intermediate, advanced, expert)
- Group-specific article filtering
- Search functionality for titles, authors, and abstracts
- Enhanced instructor role capabilities including:
- Special access group management
- Student management within groups
- Article backup and restore functionality
- Enhanced admin role features for managing groups and system backups
Implementation Plan
Given these requirements, we focused on implementing:
-
Special Access Groups
- Encrypted article storage and decryption
- Admin rights management
- Instructor viewing rights
- Student access control
-
Enhanced Search and Filtering
- Content level filtering
- Group-specific filtering
- Title/author/abstract search implementation
-
Message System
- Generic help message support
- Specific help request tracking
- Search history logging
-
Backup/Restore Functionality
- Article backup system
- Group backup capabilities
- User permission backup
We can now bind roles to articles. This means that only users with the appropriate roles can view certain articles. This is a crucial feature for the help system, as it allows the instructional team to provide sensitive or restricted information to specific users while keeping other articles public. Now, there are two ways of implementing this feature:
- Role-storing Access Control: This method involves storing the article's IDs in each role object. When a user requests an article, the server checks if the user's roles contain the article's ID. If it does, the article is returned; otherwise, the server returns an error. This method is simple and efficient but requires additional storage for each role object.
- Article-storing Access Control: This method involves storing a list of role IDs in each article object. When a user requests an article, the server checks if the user's roles contain any of the article's role IDs. If it does, the article is returned; otherwise, the server returns an error. This method is more efficient in terms of storage but requires additional processing to check each article's role IDs.
Overall we decided to go with the Article-storing Access Control method as it was more efficient in terms of storage and allowed for easier management of article permissions.
To do this, we did not need to change the role model, but we did need to update the article model to include a list of role IDs that could access the article. Here's what the updated article model looks like:
type Article = {
  aId: number; // Unique identifier
  level: number; // 0 = public, 1 = private, 2 = unlisted
  groups: string[]; // Tags / categories

  createdAt: number; // Date created in epoch ms
  updatedAt: number; // Date updated in epoch ms
  title: string; // Title
  description: string; // Description in Markdown
  keywords: string[]; // Keywords for SEO

  body: string; // Body in Markdown

  links: string[]; // Links to other articles
  whitelistedRoles?: string[]; // Roles that can view the article **NEW**
};
Note the addition of the whitelistedRoles field, which contains a list of role IDs that can access the article. This field is optional, as some articles may be public and not require any specific roles to access them. We will represent a public article by setting the whitelistedRoles field to an empty array or omitting it entirely. If the whitelistedRoles field contains role IDs, only users with any of those roles can access the article.
Now that we have our updated article model, we can move on to the implementation. Unfortunately, I was not primarily involved in the backend implementation, so I will focus on the frontend implementation for this phase.
There are no new endpoints required for this phase, as the existing endpoints for creating and retrieving articles will be used to implement the new features.
Implementing the Frontend Phase 3
Phase 3 was fairly straightforward in terms of frontend implementation. I began by updating the Create Article page to include a field for selecting the roles that could access the article. This field contained a list of all available roles, which the user could select to restrict access to the article. This approach allowed me to create a simple and intuitive user interface for setting article permissions, which would be easy for users to navigate and use.


The create article page with unrestricted access (Above) and restricted access (Below). The user can toggle which roles can access the article. All roles can access the article by default.
I then updated the Article Page to check if the user's roles contained any of the article's whitelisted roles. If the user's roles did not contain any of the whitelisted roles, the user would be redirected to an error page. This approach allowed me to restrict access to articles based on user roles, providing users with a more personalized and secure browsing experience.
Below is the updated code for the Article Page, which checks if the user's roles contain any of the article's whitelisted roles. If the user's roles do not contain any of the whitelisted roles, the user is redirected to an error page.
  if (
    !!article.whitelistedRoles?.length &&
    !self.roles
      .map((role) => role.id)
      .some((selfRole) => article.whitelistedRoles?.includes(selfRole))
  ) {
    let roleDBStr = globalThis?.localStorage?.getItem("roleDB");
    let roleDB = [] as {
      _id: string;
      name: Role;
    }[];
    if (roleDBStr) {
      roleDB = JSON.parse(roleDBStr) as {
        _id: string;
        name: Role;
      }[];
    }
    let requiredRoles = article.whitelistedRoles
      .map((role) => {
        let roleData = roleDB.find((x) => x._id === role);
        return roleData ? roleData.name : null;
      })
      .filter((x) => x)
      .map((x) => roleDictionary(x as Role));
    return (
      <ErrorPage
        statusCode={403}
        overrideString={`
      You do not have the required access to view this article, please contact an admin for more information. Missing roles: ${requiredRoles.join(
        ", "
      )}
       `}
      />
    );
  }
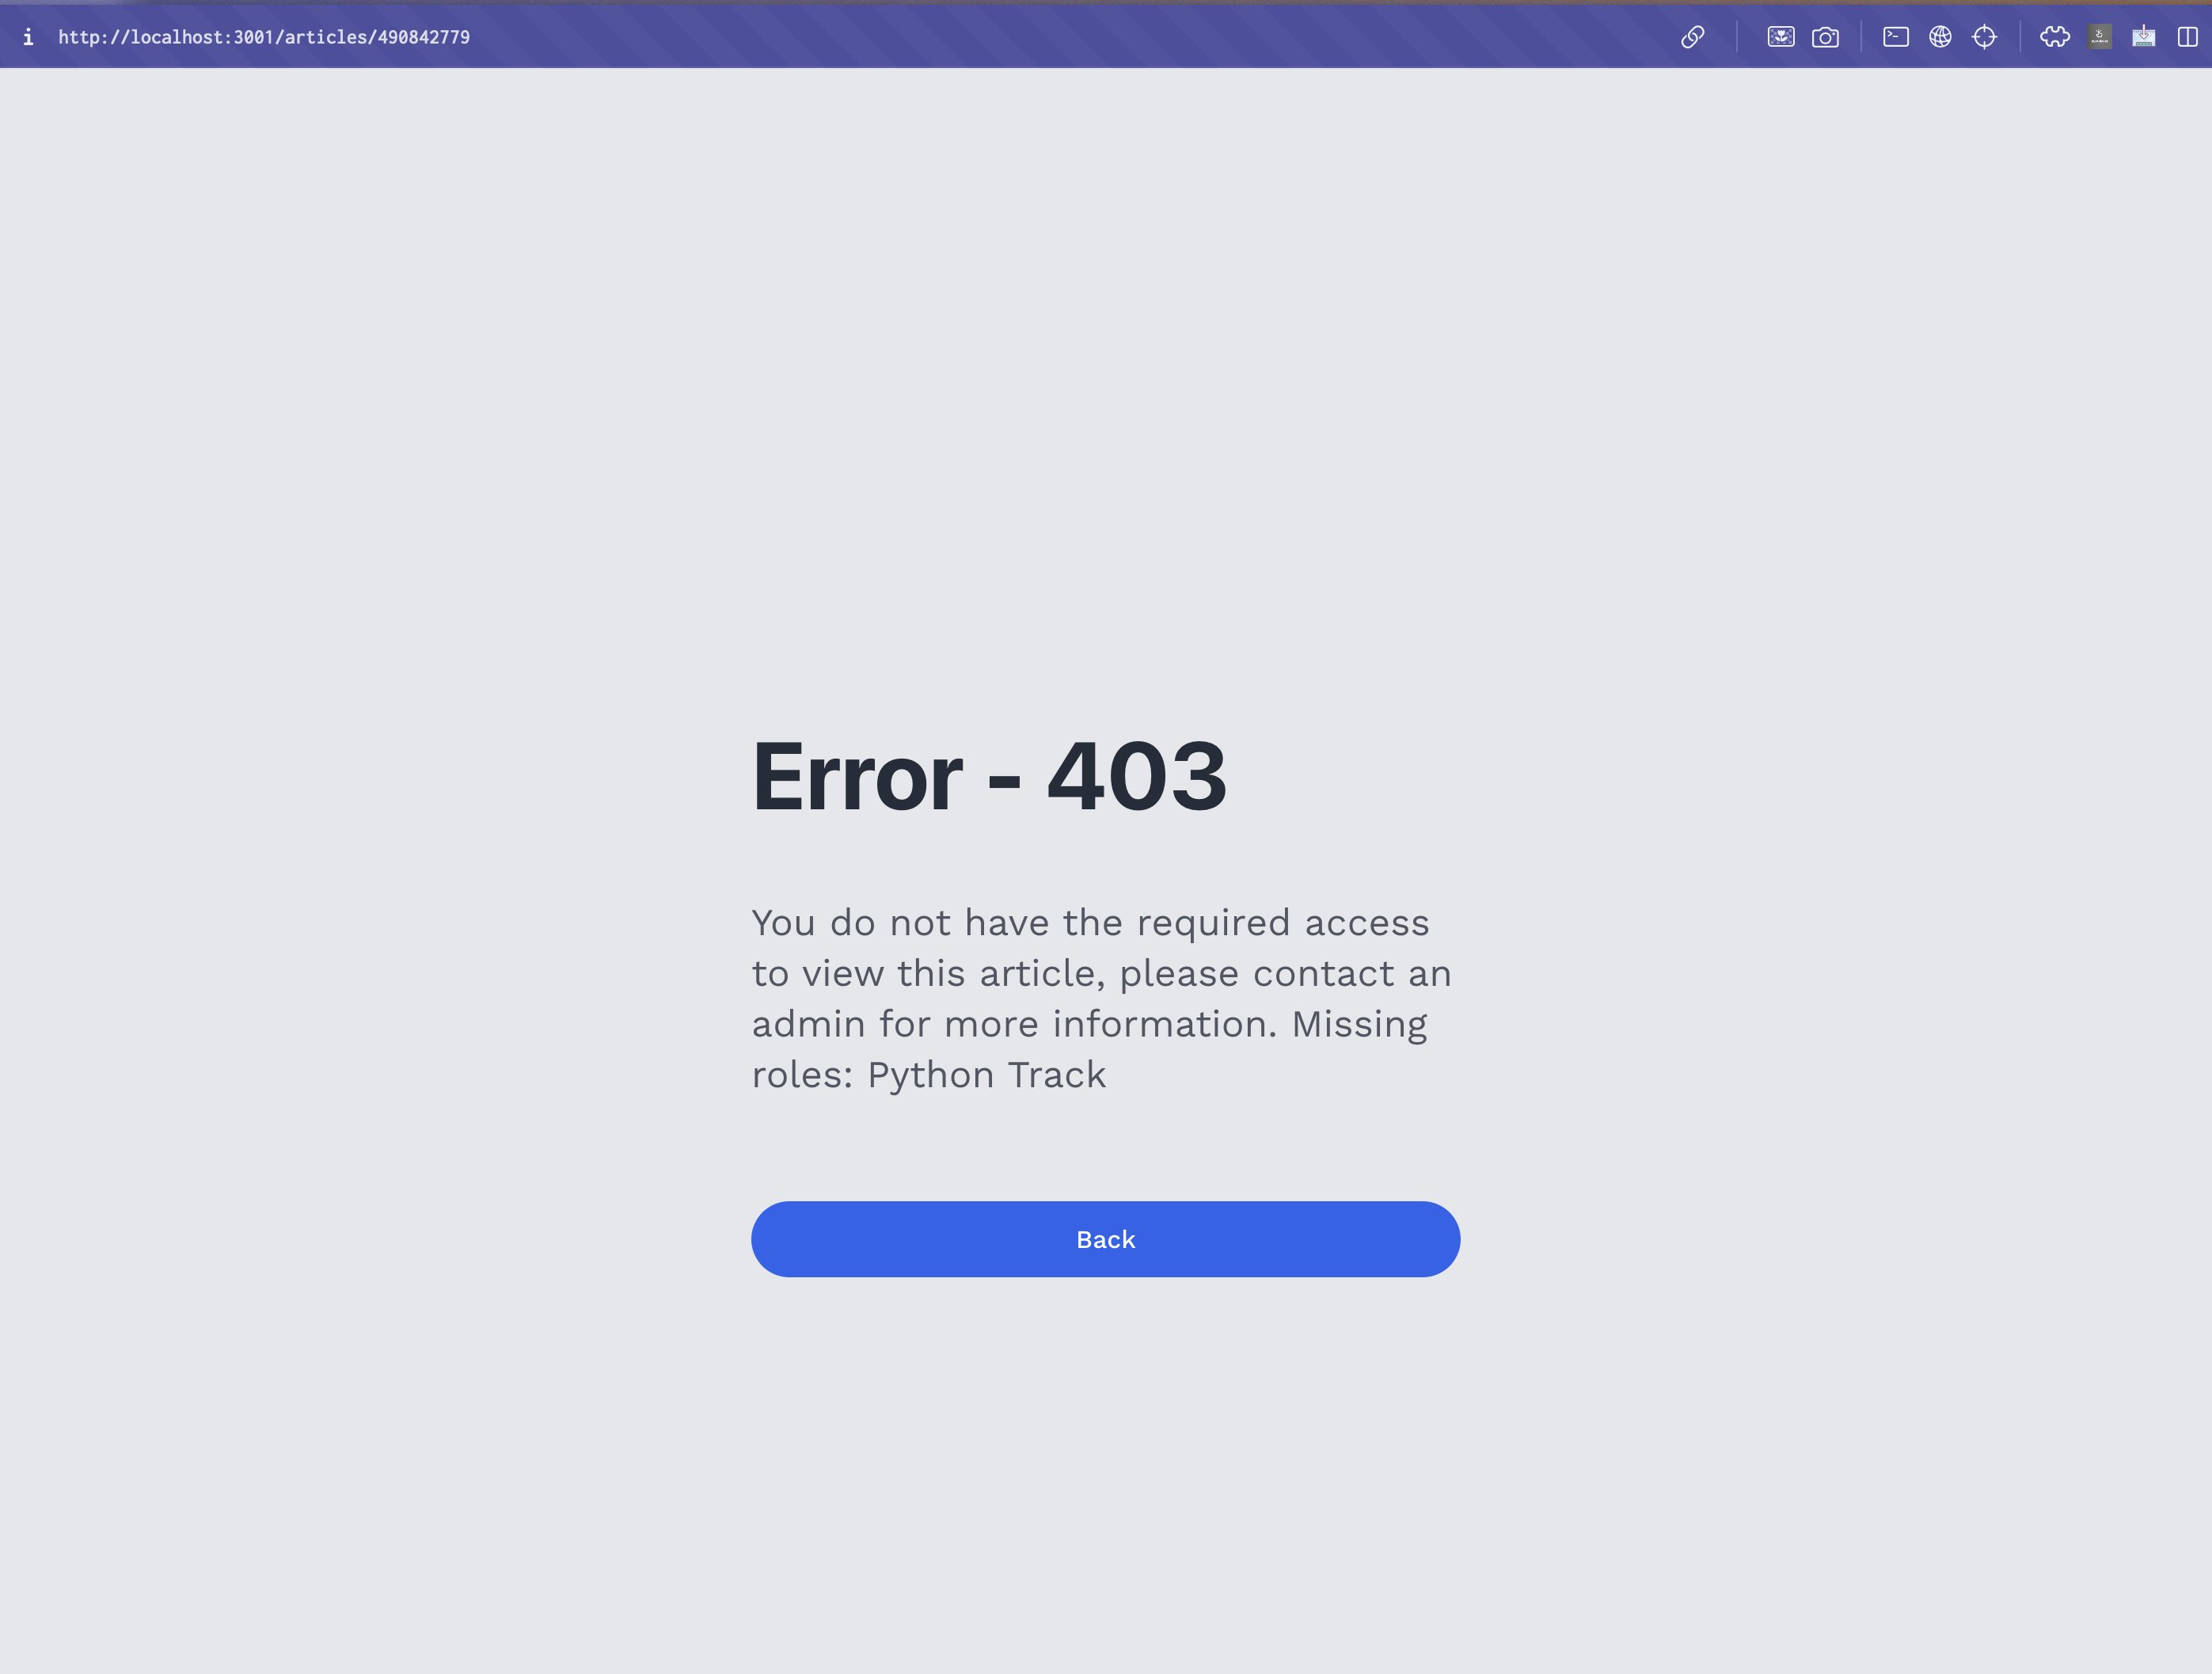
The error page displayed when a user does not have the required roles to access an article. The error message includes the missing roles that the user needs to access the article.
Backups and restores were also implemented in this phase. I created a simple backup system that would allow admins to back up the entire system, including articles, roles, and users. This system would create a JSON file containing all the necessary data, which the admin could download and store for safekeeping. The restore functionality allowed admins to upload a backup file and restore the system to a previous state. This approach allowed admins to easily back up and restore the system, providing them with a reliable and secure way to manage the help system.
Due to the growing importance of roles and permissions, I also implemented both an Invite Management page and a User Management page. The invite management page allowed admins to invite users to the system by sending them an email with an invitation link, which the user could use to create an account containing predefined roles. The user management page allowed admins to manage users' roles and permissions, including adding, removing, and updating roles for individual users. This approach allowed admins to easily manage users' roles and permissions, providing them with a flexible and efficient way to control access to the help system.
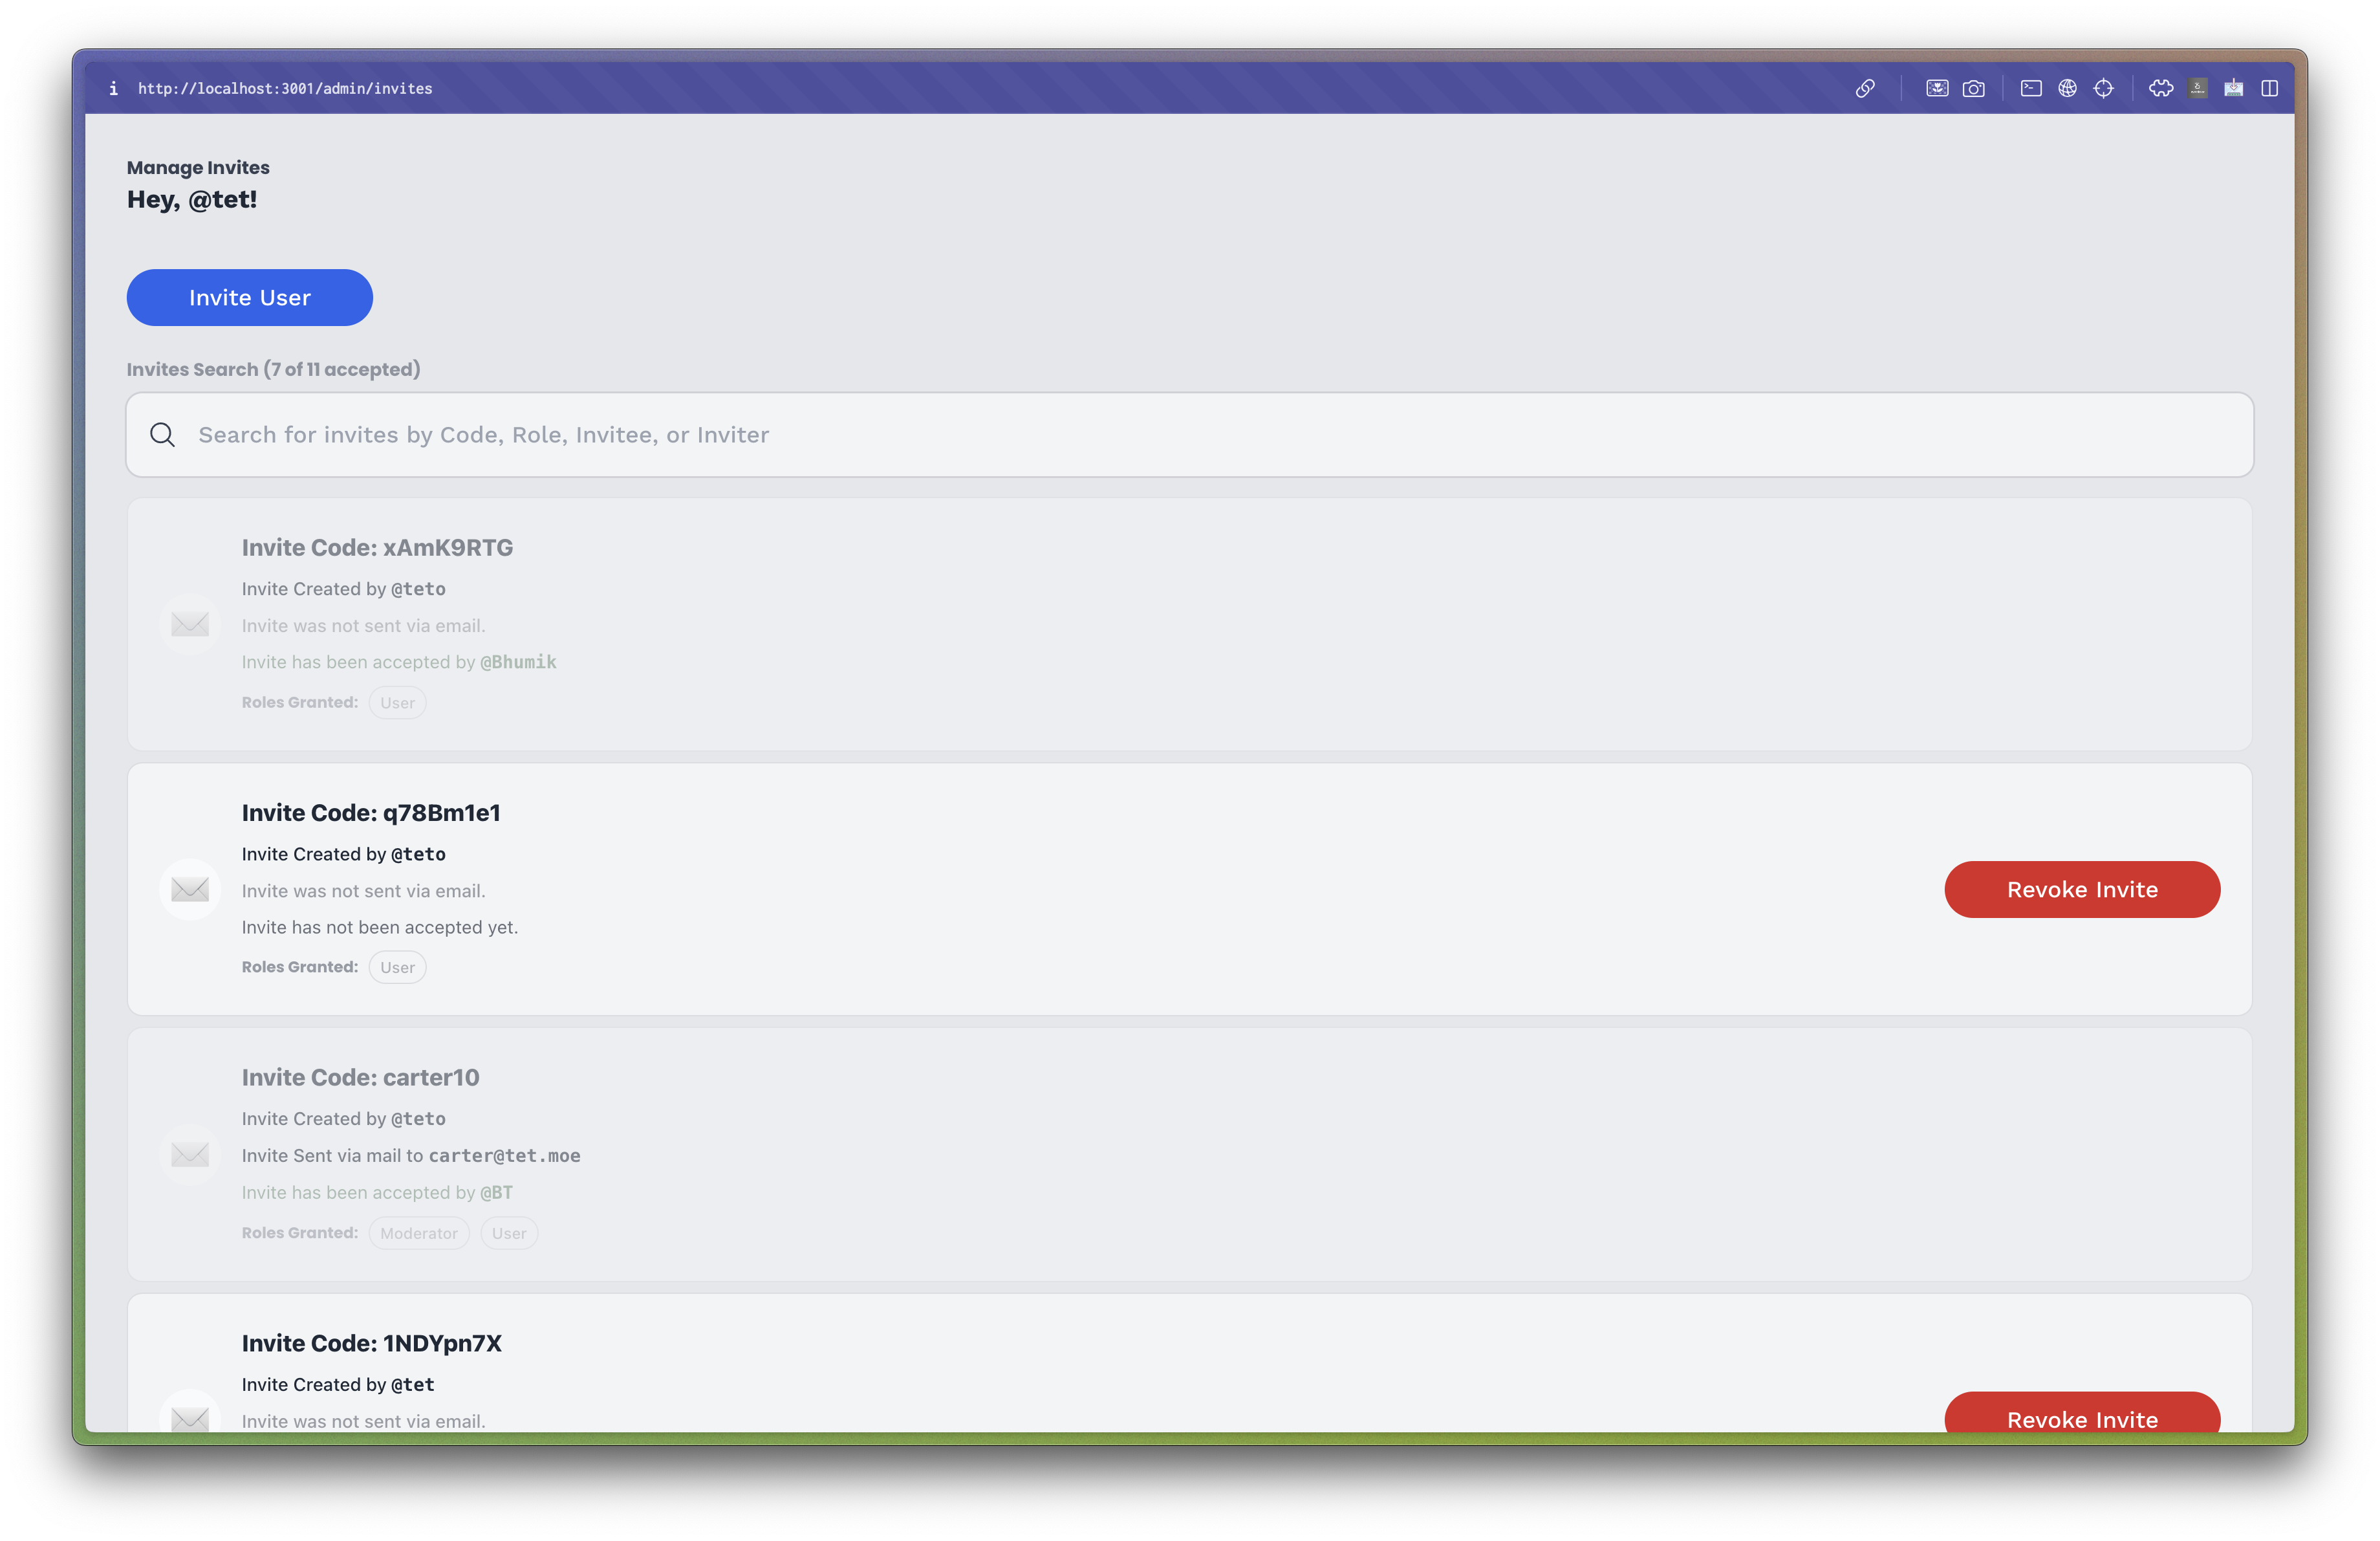
The invite management page for inviting users to the system.
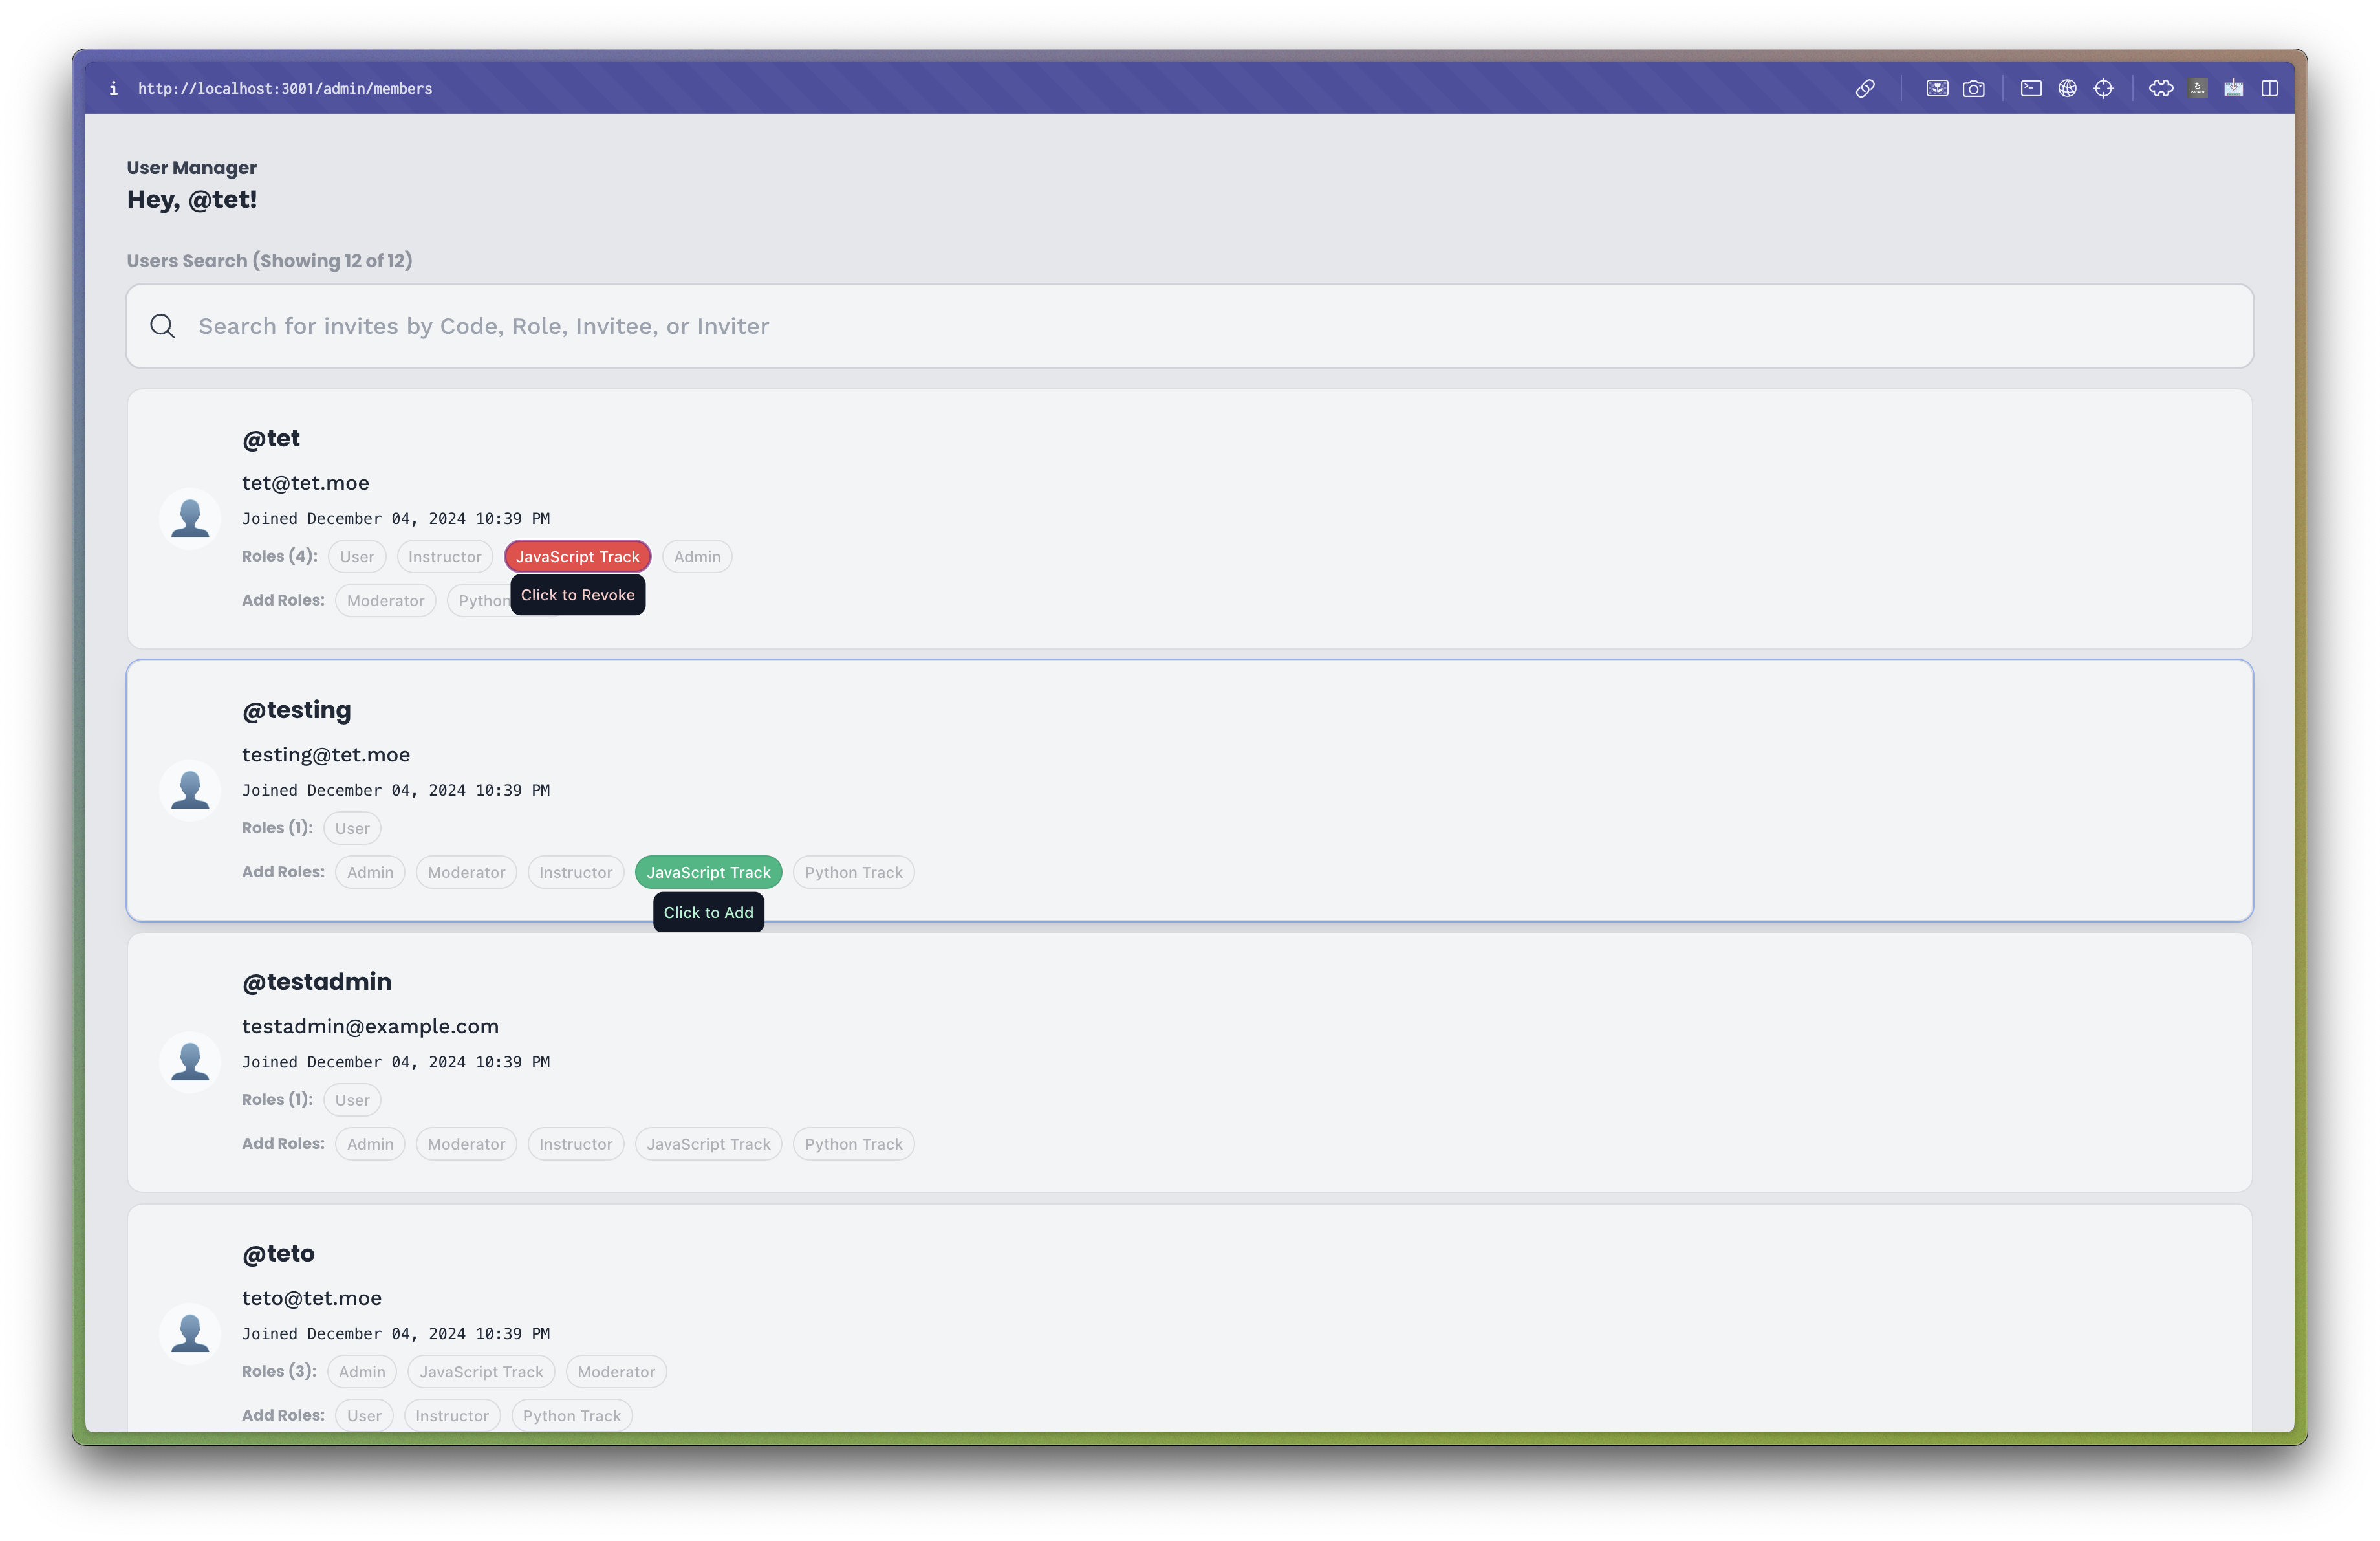
The user management page for managing users' roles and permissions.
Additional Work
This phase currently did not require notable additional work, as the focus was on implementing the core features of the help system and maintaining consistent ARIA support.
Phase 4 and beyond
Phase 4 was mainly a continuation of the work done in previous phases, focusing on refining the existing features and preparing the application for deployment. However, as the project timeline comes to an end, there are still several areas that could be improved or expanded upon in future iterations. Some of the potential areas for improvement include:
- Offline Support: Implementing offline support for the help system would allow users to access articles even when they are not connected to the internet. This could be achieved by using service workers to cache articles and other resources, providing users with a seamless browsing experience.
- User Analytics: Implementing user analytics would allow admins to track user interactions with the help system, such as article views, searches, and messages. This data could be used to improve the user experience and provide users with more relevant content.
- Article Versioning: Implementing article versioning would allow admins to track changes to articles over time and revert to previous versions if needed. This feature could be useful for managing updates and revisions to articles.
- AI Summarization: Implementing AI summarization would allow students to quickly get answers to their questions by having an AI summarize the article content. This feature could save time and provide users with a more efficient way to access information.
- Enhanced Search: Implementing enhanced search functionality, such as autocomplete and suggestions, would improve the user experience and make it easier for users to find the information they are looking for.
- Mobile Support: Improving mobile support for the help system would allow users to access articles on their mobile devices, providing them with a more flexible and convenient browsing experience.
- Integration with LMS: Integrating the help system with a Learning Management System (LMS) would allow students to access help articles directly from their course materials, providing them with a more seamless learning experience.
- Multi-Language Support: Implementing multi-language support would allow users to access articles in their preferred language, making the help system more accessible and inclusive to users from different backgrounds.
- Improved UI/UX: Improving the user interface and user experience such as adding a dark mode, performing A/B testing, and optimizing the application for performance would provide users with a more engaging and enjoyable browsing experience.
- Security Enhancements: Implementing security enhancements such as rate limiting, input validation, and encryption would improve the overall security of the help system and protect user data from unauthorized access.
- Better Safe Practices: Implementing better safe practices such as using environment variables for sensitive information, implementing HTTPS, and using secure authentication methods would protect the help system from security vulnerabilities.
- Automated Front end: Front-end testing and deployment could be automated using CI/CD pipelines to ensure that the application is always up-to-date and bug-free.
Closing Thoughts
The CSE 360 project was a challenging yet rewarding experience that allowed me to work on a real-world application with a team of talented individuals. By focusing on the frontend implementation, I was able to create a simple and intuitive user interface for the help system, which would provide users with a seamless browsing experience. The implementation of ARIA labels significantly improved the user experience for users with disabilities, making the application more accessible and inclusive to all users. By implementing role-based access control, I was able to restrict access to articles based on user roles, providing users with a more personalized and secure browsing experience. The backup and restore functionality allowed admins to easily manage the help system, providing them with a reliable and secure way to control access to the system. Overall, the CSE 360 project was a valuable learning experience that allowed me to apply my skills in a real-world setting and work collaboratively with a team to create a functional and user-friendly application.